 I love my iPad in the classroom (in case you haven't heard that from me before)! It's useful in such a wide variety of ways, but the best part about it is the ability to create with it. Creating is pretty high up on Bloom's Taxonomy (the Langwitches Blog has an awesome infographic of Bloom's and iPad apps), and is definitely how we should be using the iPads if we're lucky enough to have them in the classroom. The picture to the left was created with the Thinglink app (free!). The picture was taken in a Grade 8 math class where I did a lesson a few weeks ago based on the sugar content in drinks. It was a fun lesson to do. The students were asked to bring in their favourite drink and rank them according to their opinion of least healthy to most healthy. Then we examined the nutrition labels on the back and determined the amount of sugar in each drink. This was the difficult part, as not all labels are created equally, as many of you know. Some labels indicated the amount of sugar in the drink, but some indicated the amount of sugar in one serving size of the drink, which was less than the container held. That's where the math came in to play! Then we re-ranked them according to sugar content, and added interactive buttons using Thinglink. To use Thinglink, a photo is uploaded into the app. Then you tap the screen to add interactive items, such as a YouTube video, text or another picture. The red dots are tapped to open them, which gives more information than the photo does. Click here to see how this photo has become interactive. Once the project is complete, it is saved, and then easily shared via email or social media. Wouldn't it be cool to email the link to parents, or add to your class or school blog or website? 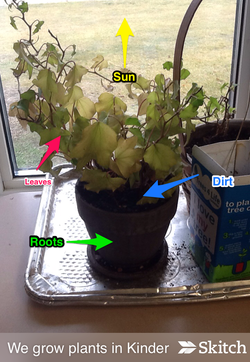 I introduced Skitch to my blog followers a few days ago when I wrote about some of my favourite apps. The photo to the left was uploaded into the Skitch app, and then students easily marked it up with arrows and labels. Skitch, which belongs to the Evernote family of apps, also allows other shapes and drawings to be included. Great for students to share new knowledge. The picture below shows some of the options available with the app. One of my favourite tools is the blurring tool (at the top of the options). This is awesome for publishing pictures of students online if you don't have permission to show students' faces. Simply blur the faces, and they are virtually unrecognizable!  Under the blur tool, is the undo/redo tool. Under that is the drawing tool, which allows you to make line drawings of any type. Next is the shape tool, which allows the inclusion of lines, rectangles and circles. The next tool is the labelling tool, which opens the keyboard. The final tool is the arrows. 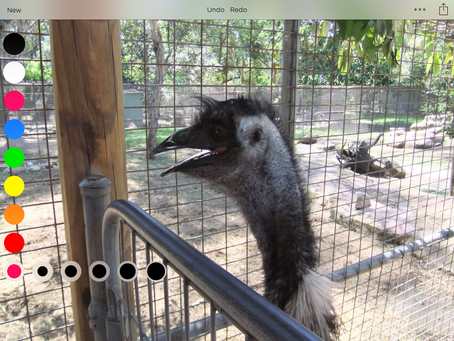 The last picture shows the various colours available with this app, as well as thickness.
This app is so easy to use! Students catch on extremely quickly. And the best part? It's free too!
0 Comments
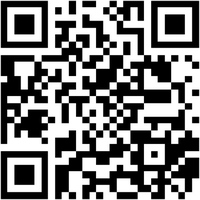 So, what are QR Codes, you ask? Well, you know what barcodes are, like when you buy something at the store and the clerk scans a code to enter the item and amount into the till? The QR (Quick Response) Code is kind of like that, except that it offers much more information. Quite often the QR Code will give you a link to a website, or a text message, image, etc. To read the QR Code, you need to install a QR Code Reader onto your device. There are many available for free. I like using i-nigma, seen below. Simply open the app, point it at a QR Code and your device will do the rest. Try it with the code above. It should take you back to this blog.  Here's how to make a QR Code. 1. Go to the website you want the QR Code to send people to. Right click to copy the website address. 2. Go to a QR Code Generator site. Again, there are so many out there. For simple QR Codes, like ones that link to a website, or offer text, I like goQR.me, which is free, and you don't need an account. 3. Click "url," and paste the website address into the box. Then click enter. 4. The QR Code will be shown at the right of the screen. Simply right click on the image, and select either copy image or save as, depending on how you wish to use it. 5. That's it. Easy peasy! OK, that's all fine and dandy, but why would I want to make a QR Code? How can I use this in my classroom? Well, that's a very good question! :) Here's an awesome YouTube video I came across as I was researching this question. It's only 2 minutes long, and worth a watch! So, there's one way to use QR Codes in the classroom - to link to Book Trailers! I absolutely LOOOOOVE this idea, and want to try it out very soon! Here are some other ways to use QR Codes with your students:
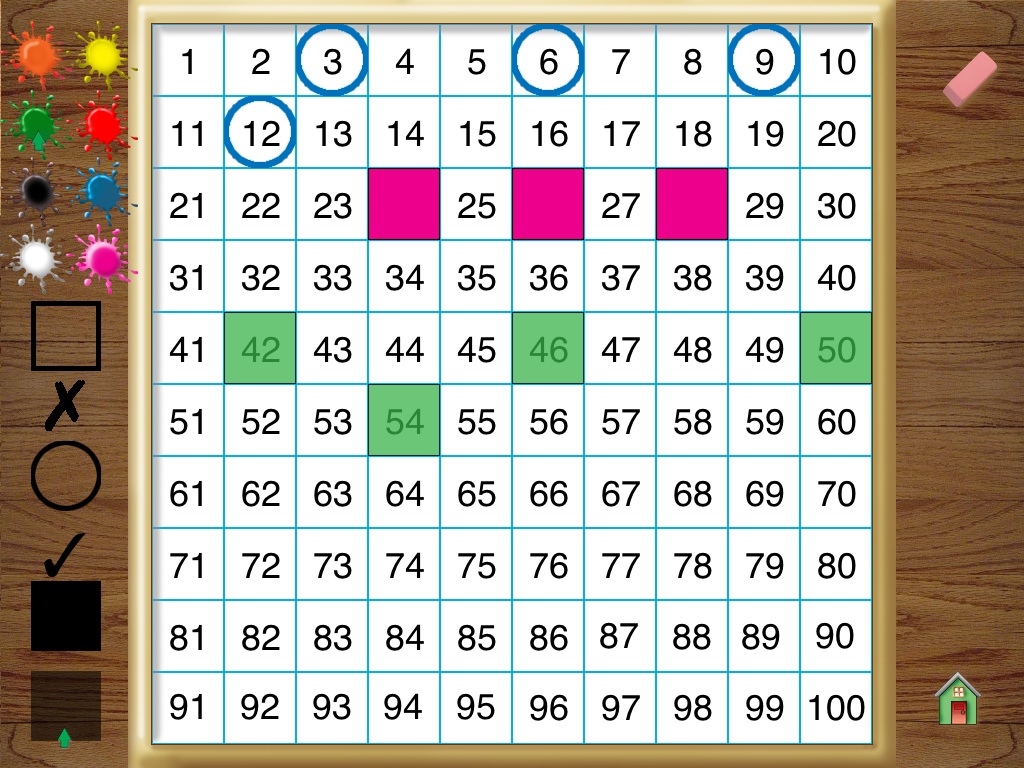
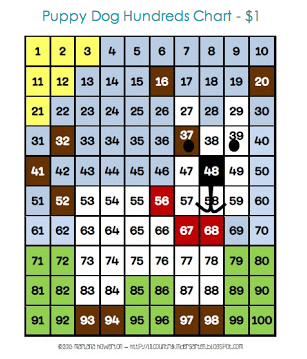
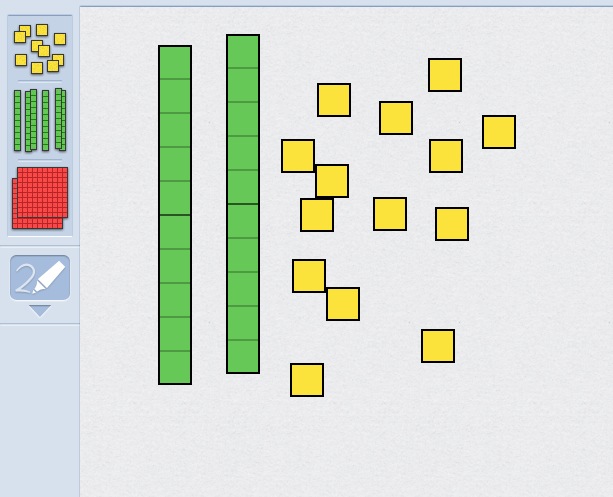
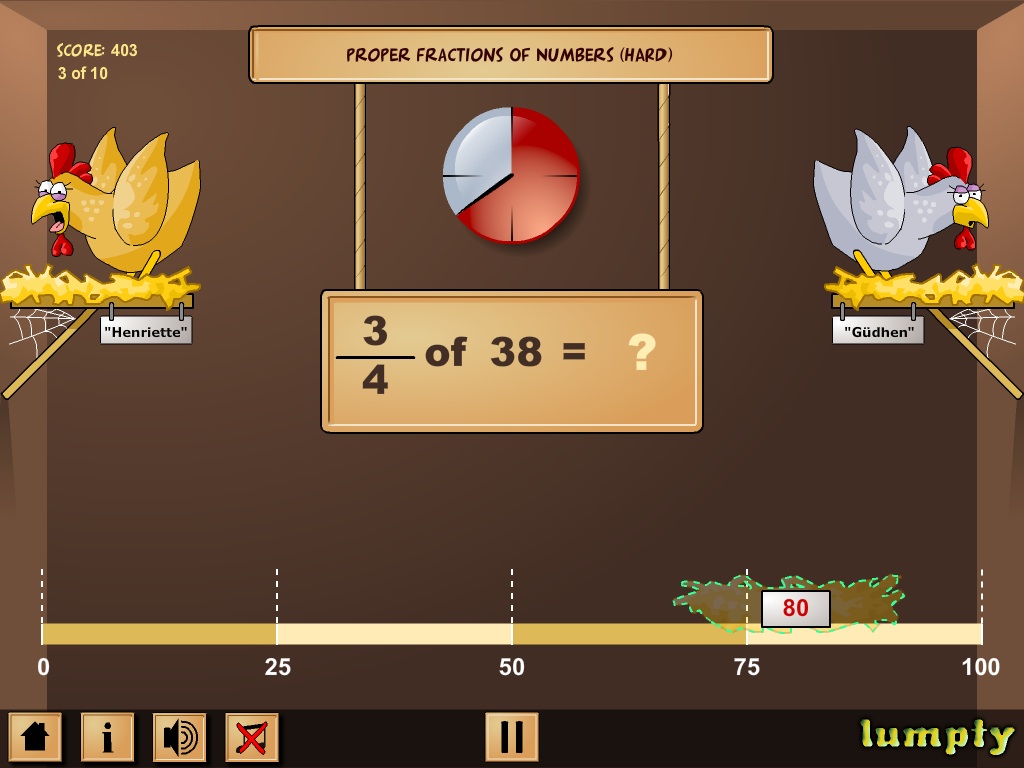
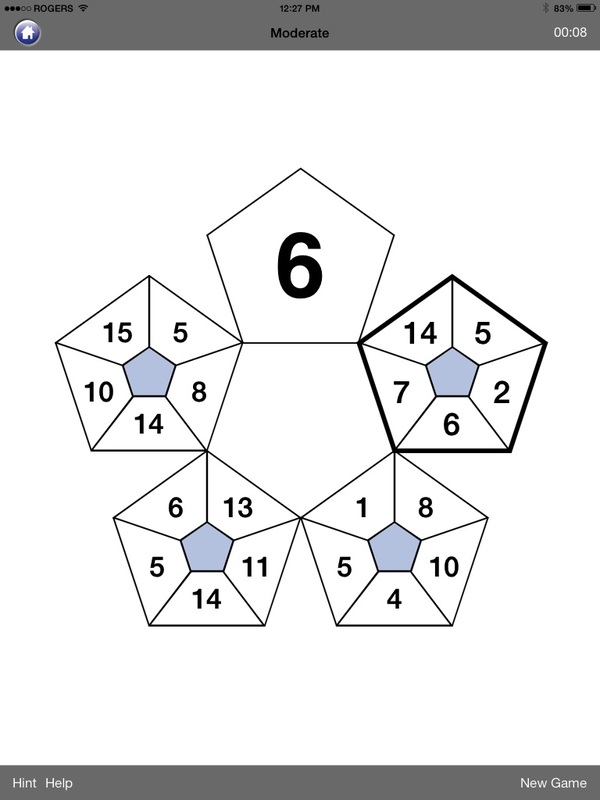
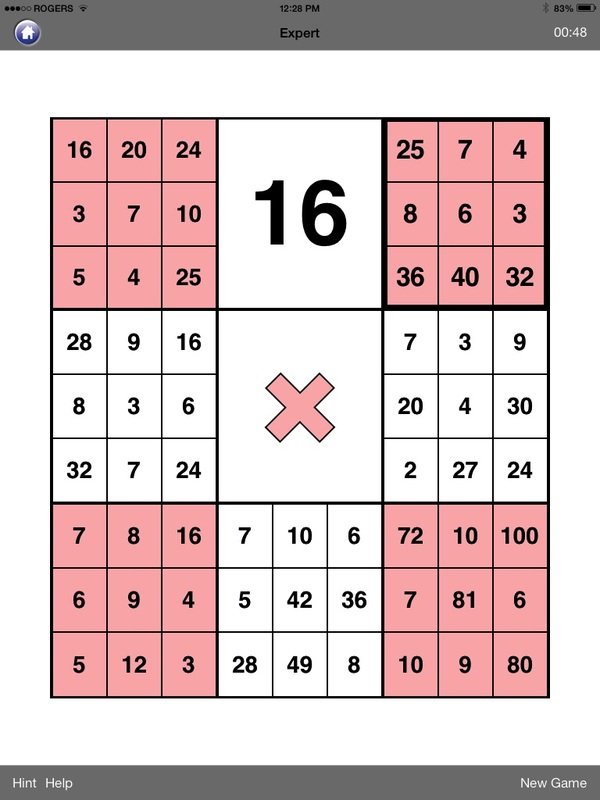
Some common problems with QR Codes are when the code becomes unreadable, likely if it's been crumpled or torn, or if the lighting is too poor. Don't laminate the codes, as the shine also makes them difficult for a device to read. If a website address is very long, it makes the QR Code very dense, and slows down the response time. To correct this problem, use a url shortener site like bitly.com. There are just so many great ideas out there! What's more, QR Codes are easy and free to create, portable, and there's a coolness factor to them that really grabs kids (and adults too!). It saves paper, and time too! 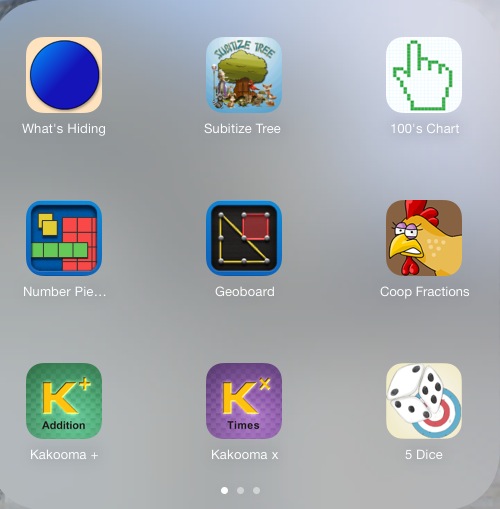 OK, Part 2 of the last post. This list of 9 apps is the folder of math apps I use most often when I visit classrooms that are looking to integrate technology with their math program. These apps can be used as a work station for Guided Math, or tools for the teacher to use when instructing, or for the students themselves. They are also just fun for students to "play" with! These apps, if not free, are very affordable. 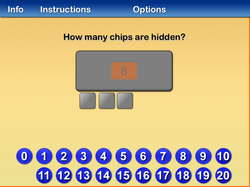 1. What's Hiding This math app is best for students in PreK-Grade 2. Students count the number of shapes that are shown and then the shapes are covered up. Some of the shapes are pulled out from under the cover and students must say how many are still underneath. Great counting, addition and subtraction practice, and wonderful for teaching inverse operation and the "use addition for subtraction" strategy. $0.99. 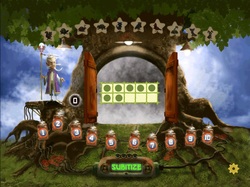 2. Subitize Tree I love this app! And kids do too! The old math ninja asks students to get ready for the doors on the tree to open up for a few seconds (3 levels of difficulty). Students have not quite enough time to count how many they see behind the doors before they close again. Then students say how many shapes were shown. If they are correct, they get a point. 4 points sets an animal free from the tree. The picture here shows a ten frame, but there are lots of options to choose from. Lots of fun! $0.99. 3. Hands-On Math Hundreds Chart This app is a blank Hundreds Chart onto which you can add circles, or black out or highlight numbers. Students can use the app as a tool in much the same way they use a regular 100 Chart, as support for addition, subtraction, patterns, etc. But teachers may use it to have students identify which number comes next in the pattern, which number would be the 10th number, name the pattern rule, and more. Or give students clues to the numbers to highlight, such as "Highlight this number blue: 5 x 9," or "Highlight this number yellow: two tens and one more." The finished product is a picture or word. The picture above is from a nice little blog called Lil Country Kindergarten. If you search for 100 Chart Pictures on Pinterest though, you'll find loads of these 100 Chart pictures, including an awesome sight words product from Jessica Travis! The app is $1.99. 4. Number Pieces Basic Number Pieces and Number Pieces Basic are two apps that use Base Ten blocks. Basically, anything you can do with Base Ten Blocks, you can do with this app. I really like how the blocks can be joined together, so that 10 units makes 1 ten (a long), and 10 longs can be joined to make 1 hundred (a flat). The blocks can also be broken up into smaller units. The only difference between them is that Number Pieces has a few more features, including a measuring tape that shows the dimensions of arrays that students build. This is an awesome teaching tool! FREE! 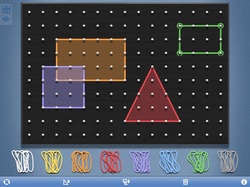 5. Geoboard This is another app that can be used just like the real item. One of the main differences between this app and the real thing is elastics that don't break, or go flying around the room! :) For younger students, ask them to make the various 2-D shapes. For older students, use for instruction on area and perimeter. Even creating arrays for multiplication facts would be useful. Shapes can be left blank or filled in. Kids love creating their own pictures with this app. The best part? It's FREE! 6. Chicken Coop Fractions This is a humorous app that students in Grades 4 and up enjoy. There are many different levels of difficulty, so even students in Grade 8 would be challenged by this game. The chickens in the coop each take turns laying eggs. The player must determine where to place the nest so that the egg lands softly. Players must estimate approximately where to place the nest on a number line according to the fraction given. Hilarious! And free. 7. and 8. Kakooma Addition and Kakooma Times I first heard about these games from Greg Tang at the NCTM conference in Chicago last year (which was an amazing conference, by the way, and I hope to go again this year!). These apps are wonderful for students' practicing their fact fluency. They play against themselves, receiving a score each time, and they try to beat their score with each game. There are four levels of difficulty (Basic, Moderate, Advanced and Expert). The first picture above is a Moderate Addition game. The shape that has a bold border is the series of numbers you look at first. Within the numbers shown, two of those numbers will add to a third number, which is the number to click. In the first picture, 5+2=7, so you click on the seven. Then go to the next series of numbers. The second picture is from the Expert Multiplication game. Way more numbers to choose from! There are Pro versions of these games, but they are more difficult. These games are free to play online from Greg Tang's website, and include an Integers and Fractions version as well. $0.99 each. 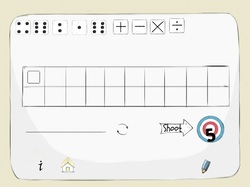 9. 5 Dice Order of Operations
I have seen this game played with a deck of cards and a few extra cards with the operations printed on them. You can choose the level of difficulty by clicking on which operations to include. You must use all 5 numbers and whichever operations you need to create the target number shown. The premise is simple, but it's really not that easy! For older students, the order of operations is in effect and must be considered (there is a level which includes brackets). Lots of fun, and quite challenging for older students. Free! 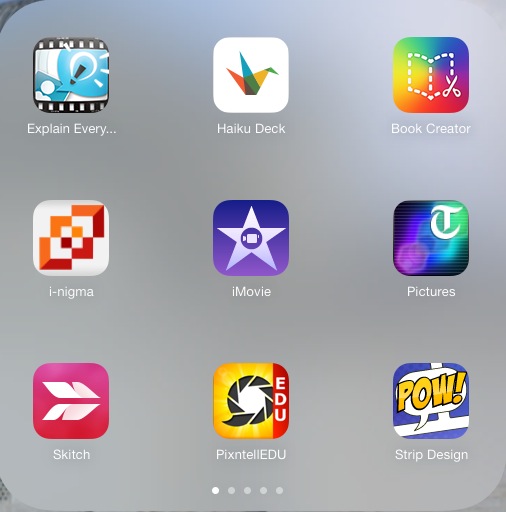 I'm feeling Christmassy these days, hence the title of this blog post. Now I can't get the tune out of my head. :) These 9 apps make up the first screen of the folder on my iPad titled Ed Tech. They are my "go-to" apps, the ones I use in almost any classroom, regardless of the age of the students or the subject.
1. Explain Everything I wrote about this app a couple of months ago (click here), and I have often said that if I could have only one app this is the one it would be. This screencasting app is essentially a whiteboard on which you can add and record images, text, audio, video (the list is seemingly endless) to produce a video or picture. It is great for student projects, and many teachers use it for flipping their classroom, as well as for both summative and formative assessments. I have used it with students as young as Kindergarten age, and certainly high schoolers would find it beneficial for their projects as well. It is definitely a "must-have" for any classroom with iPads. $2.99. 2. Haiku Deck Haiku Deck is a presentation and slideshow maker, and is a wonderful alternative to PowerPoint presentations. What is so great about it, besides the beautiful images that can be uploaded, is that the text is limited (think Haiku poetry). This forces students (and adults) to choose only key words and phrases that each slide should have, and prevents students (and adults! LOL) from just reading what is on their slides (so boring!!). Free. 3. Book Creator Another app with endless creativity options! Easy enough for our youngest students to use, but with enough options that certainly middle schoolers would enjoy using it too. With this app, students add photos, images, text and audio to create storybooks. You have an unlimited umber of pages to use to create your story, and the finished product can be shared easily, and even opened in iBooks. Great for personal or class collaborative stories! $4.99, but worth it! 4. I-nigma I-nigma is a QR Code Barcode Reader app. I wrote about using this app in Guided Math classes a while ago (click here), but QR Codes can be used in so many valuable ways in education. A QR Code contains a link to text, image, URL, and more. Display a QR Code to have students all go to the same website, reducing valuable time having them type in the address, especially if it's a long one. Have students create a movie of their book review and then paste a QR Code inside the book so that when other people check out the book from the library, they get a link to that student's review. Endless possibilities. Hmm, I should blog about this one of these days... There are many free QR Code making websites out there but I like goqr.me the best. Free. 5. iMovie I am sure you've heard of iMovie before, so I won't go into too much detail on this one. Turn your photos, audio clips, music and video into movies or trailers. They can be as long or short as you like, and you can start from a blank slate or use one of the many templates Apple has made available. I particularly like them for book trailers. $4.99. 6. Telegraph Pictures I wrote about this app a while ago also (click here), and about how it can be used in an ELA classroom to boost reading comprehension by deciphering photos. This app uploads about 10 pictures daily, and they are photographs of top news stories (human interest too) from around the world, as seen in the London Telegraph. I love the current events connection. Free. 7. Skitch Skitch, by Evernote, is an app I learned about from Matt Gomez's blog. Basically you upload a photo to the app, and then add arrows, text, drawing, etc. It's great for younger students for labelling. I have used it in a Grade 3/4 class where the students uploaded photos of the earth, and then labelled the northern and southern hemispheres, equator and poles. Another great feature of this app is the blurring tool. If you have some students in your classroom whose parents/guardians have not given permission for their child's image to be posted online or in a public forum, the blur tool can be used to obscure that child's face so class pictures can still be used publicly. After the picture has been created, it can easily be shared. Free. 8. PixnTell With PixnTell, photos can be uploaded and arranged in a particular order. Then, use the recording feature to talk about the pictures. When you click create, the pictures and your recording are stitched together to create a video. Great for projects and so easy to use! And it's free! 9. Strip Designer This app creates comic strips. Choose from the wide array of templates and upload the pictures you want to use to tell your story. Then add speech bubbles and text, and any other stickers that would add to the personality of your story. Great for ELA, of course, but also for any presentations in other subject areas as well. $2.99. Many teachers struggle daily with differentiating their math instruction in order to meet the needs of all the learners in their classrooms. Guided Math is one way to provide the differentiation needed, as it allows the teacher to work with small groups of students while the rest of the class is engaged in meaningful math tasks. There is no cookie cutter solution, however, and teachers must find the method that works best for them. Here are a few structures I have learned about, based on a 75-minute math class (in Manitoba, math instruction is recommended to be 15% of the school day for Grades 1-6 and 17% for Grades 7 and 8). 1. 15 minute mini lesson, followed by 4 work stations. One of the work stations is with the teacher, and the other 3 are practice stations (math games, using manipulatives, math project, math literature, math with technology, etc.). Students spend approximately 15 minutes at each station, and students are grouped by like ability. Students rotate through each station once per class. Photo credited to: Enoch Lau 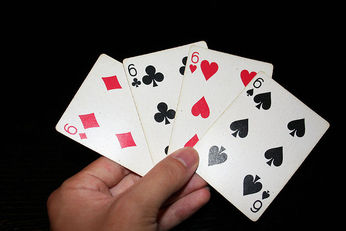 2. 30 minute lesson with the whole class, which may be teaching a problem solving strategy or mental math activity. Students then choose 2 math stations that they work on for the next 45 minutes (20-25 minutes per station). Students make the choice themselves, but must go to all the possible stations within a 1-week period. Teachers pulls 3-6 students at a time to work on a math outcome that needs review or extension. Photo credited to: kfergos Photo credited to: MrSchuReads 3. Students have been taught to start a math task independently (such as Nifty Number, Toad Code, Math jobs) or there is another adult in the room (co-teacher or Educational Assistant). When the task is completed, students go to a math work station of their choice. While this is happening, the teacher is calling 3-6 students together to work with him/her on a math topic.
There are lots of options about what the work stations or centres look like too. MATH M=Math Games A=At Your Desk (independent work or reading math literature) T=Teacher Time H=Hands-On (using manipulatives, working on projects, etc.) BUILD B=Buddy Games U=Using Manipulatives I=Independent Reading/Writing/Work L=Learning About Numbers D=Doing Math (practice with a new strategy) Math Daily 5 Math by Myself Math With Someone Writing About Math Math Technology Math Group This topic is so huge! There's no way I can write about it in one post. I'll be posting more info at another time. Watch for it! |
Lori EmilsonTravelling Curriculum Support Teacher Archives
April 2017
Categories
All
|


 RSS Feed
