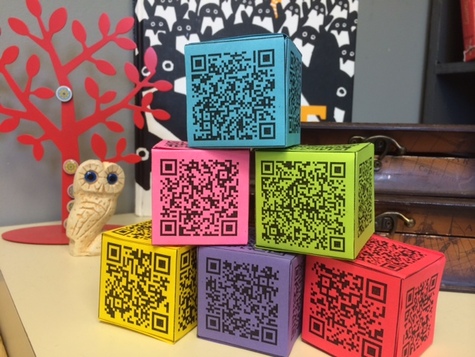
 I love QR Codes! I mostly love how easy they are to make. I wrote about it last year (click here) but I'll recap. There are so many QR Code generating websites out there - most of them free - but my favourite one is goQR.me. To create a text QR Code (a code that, when scanned, reveals a text message), here's how you do it. 1. Go to goqr.me. 2. Click the icon that looks like a page with the corner turned down. 3. In the text box (labelled "2. Contents") type the message you want the scanner to reveal. 4. The QR Code is displayed at the right of the screen. 5. You may choose to down load the code to your computer, or merely right click the image and copy it, then paste it into a document. To create a QR Code that links to a website, the steps are almost the same. 1. Go to the website you wish the scanner to link to. Right click and copy the website address. 2. Go to goqr.me. 3. Click the icon that looks like the earth. 4. In the url box (labelled "2. Contents") right click and paste the website address. 5. The QR Code is displayed at the right of the screen. There are other types of QR Codes that you can make by using this site, including a phone number, an email, a location and more! So now you know how I made the QR Math Reflection Cubes in the image above. And, you ask, "What exactly is a QR Math Reflection Cube?" I made six cubes, each with six sides and a QR Code on each side. When scanned, a prompt for reflecting on that day's math lesson is revealed. I would use it with middle or senior years students. There are six cubes, because each cube is related to a different level of Bloom's Taxonomy. I thought I would copy each one onto a different colour card stock so that I could tell them apart. It's true that I could have just printed the message on each side instead of pasting a QR Code. However, scanning the code offers some element of surprise, and it's fun (aka engaging!)! I'm sharing! The download for the QR Math Reflection Cubes is below. If you use them in class, I'd love some feedback!
3 Comments
 I have finished an amazing week with a wonderful bunch of Gr. 3- and 4-ers! Their teacher and I planned a reading response activity for them which included creating a book trailer for the book they had just finished reading. Before I arrived at their school, they had read the book and created a new book jacket for it. I made a trailer for a book as well, to show them what a trailer might like like. Here is the one I made for them about Goldilocks and the Three Bears, retold and illustrated by James Marshall. (I didn't take the time to make my own illustrations, as the students did, so I have to say the students' trailers are much, much better than mine! ) Together with the students, we created the criteria for their trailers, which we would make using iMovie. We decided that about half of the illustrations in the trailer should be their own. The trailers had to include the author's and illustrator's names, and we discussed the Fair Dealings copyright laws of Canada, which states that "short excerpts" of printed material can be reproduced for educational or review purposes. Because we wanted to upload the trailers to YouTube, we also discussed parental permission for putting their work online. Parents were asked to indicate exactly what their children could put online, including their work, their first name and their image. If permission was not granted, that child's trailer would only be viewed in class and not uploaded. If no name was to be used, the students used an alias. And if no image was to be included, we just made sure that no photos included the child's face. We really hoped that we could upload to YouTube, as we wanted to create QR codes for the trailers, as discussed below. 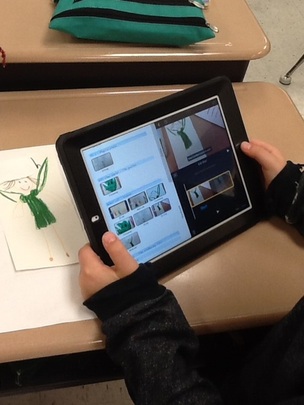 Then we got to work! Students learned how to take photos of their own and the illustrator's work, as well as how to resize, rotate and crop. Illustrations were created, and the trailers were viewed and reviewed many, many times! They also created some puppets of the characters in their books and videotaped scenes. Each student created their own trailer, as the school has 1:1 iPads on loan for several weeks. This meant that if they needed to videotape, collaboration between students would be required. It was busy and messy, but the learning in that classroom (including the teacher and me!) was amazing! Remember Bloom's Taxonomy? Creating is at the top. And while using the trailer templates didn't allow for complete creativity (lots of drag and drop), these students were definitely creating! Here's a great blog on using Bloom's Taxonomy with digital tools - the Bloomin' Peacock.
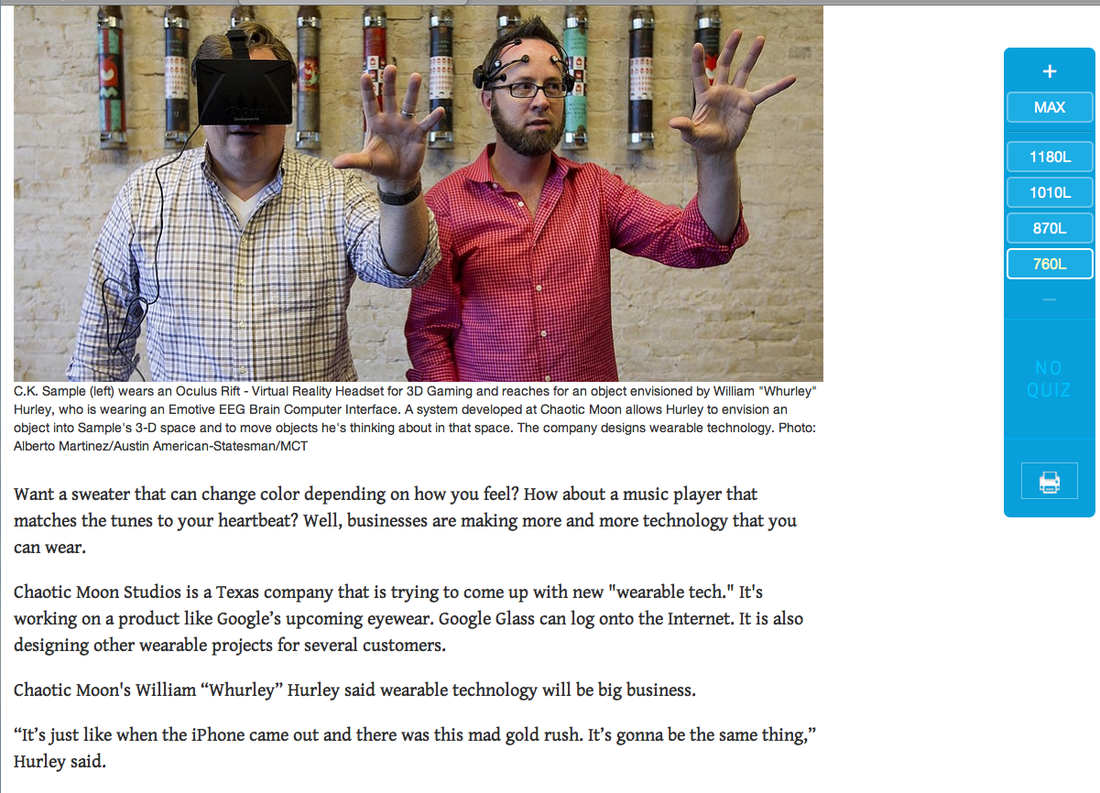
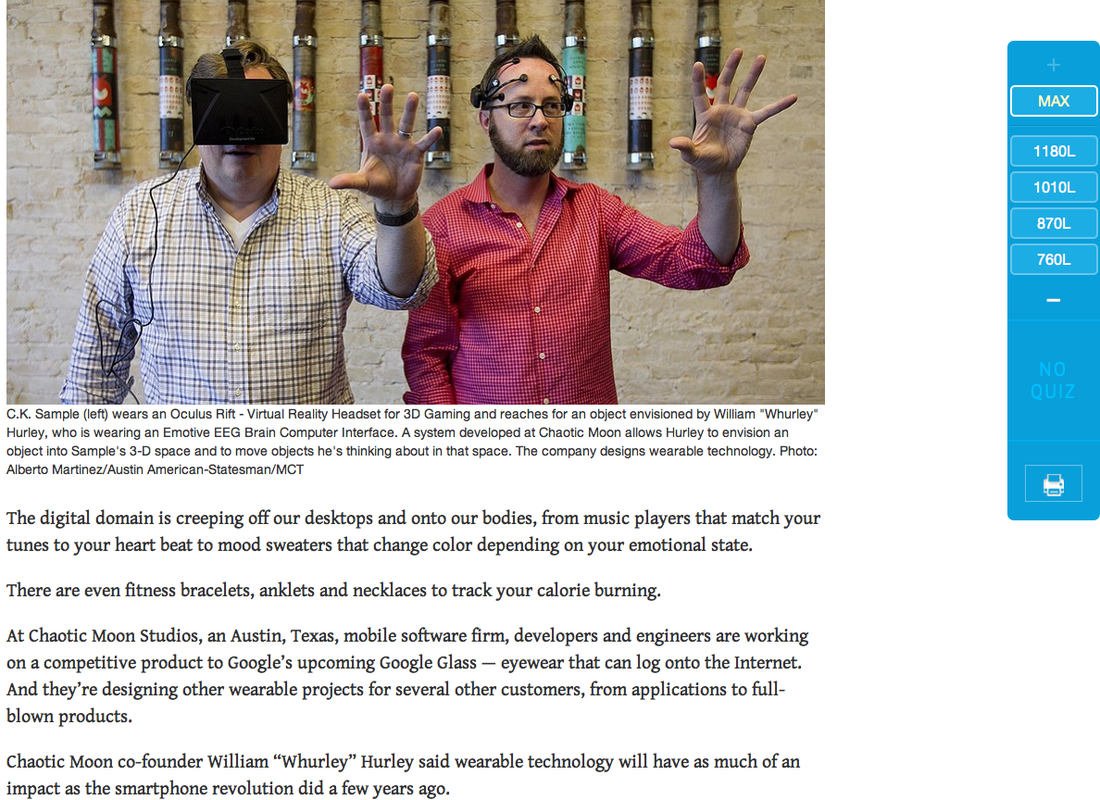
Lastly, once the trailers were completely finished, we uploaded to YouTube, and then used the share code to create a QR Code on goqr.me. We printed out the code and attached them to the inside cover of the books. Now, when students want to check out a book from the school or classroom library, they can use i-nigma or another QR Code Scanner app to easily view the trailers. (I wrote about using QR Codes in the classroom here.) I should mention that when we uploaded the trailers, we decided to make them unlisted. That means that if someone searches for the trailers, they can't be found. The only way someone can watch them online is if they have the link (or the QR Code).  It is not always easy to bring current events into the Early Years classroom, but at last I've found a way to do not only that, but to connect it with reading comprehension strategies. The Telegraph Pictures for iPad app features 12 pictures from news events around the world, taken the day prior to accessing them. The pictures are not only beautiful, but informative, interesting and even inspirational at times. Here's how I would use this in an Early Years or Middle Years classroom: 1. Choose one of the 12 new pictures and project the image in the classroom. Before the students see the image, tap on the picture so that the caption is hidden. 2. When the children come into the room, have them take paper (could be a worksheet, or could be just scrap) and have them record the following: 4 details, 3 questions, 2 connections and 1 inference. 3. After a few minutes (no more than 10), have the students turn and talk to their elbow partner. 4. Then, invite pairs of students to share their ideas with the rest of the class. Discuss how looking for important details, questioning, making connections and inferring are all reading comprehension strategies that will help them to be a better reader. 5. At the end of the class, tap the image again and the caption will be seen. Now it's time for a discussion about an event from the previous day. The next wonderful find I want to share with you is the Newsela website. This website publishes news articles related to current events, science, kids' interest, war and peace, and more. The most exciting thing about this website is the toggle at the right hand side of the screen, which allows the reader to adjust the text in the article to a higher or lower reading level. Most texts range from Gr. 4 to Gr. 12 levels, and the adjustment does not change the content of the text, nor the photo, just the readability. So students sitting right beside each other would have no idea at which level their neighbour is reading, as the page looks the same. The two screen shots above are at a Gr. 4 and a Gr. 12 level, respectively. This is a free account that teachers create. A student code is then generated for students, and teachers can assign specific articles for their class to read. New items are added regularly. There is an option for a quiz following the article, should teachers so choose. Wouldn't it be wonderful if all websites were created with this awesome feature?!!!
|
Lori EmilsonTravelling Curriculum Support Teacher Archives
April 2017
Categories
All
|
||
 RSS Feed
