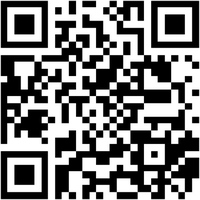
 So, what are QR Codes, you ask? Well, you know what barcodes are, like when you buy something at the store and the clerk scans a code to enter the item and amount into the till? The QR (Quick Response) Code is kind of like that, except that it offers much more information. Quite often the QR Code will give you a link to a website, or a text message, image, etc. To read the QR Code, you need to install a QR Code Reader onto your device. There are many available for free. I like using i-nigma, seen below. Simply open the app, point it at a QR Code and your device will do the rest. Try it with the code above. It should take you back to this blog.  Here's how to make a QR Code. 1. Go to the website you want the QR Code to send people to. Right click to copy the website address. 2. Go to a QR Code Generator site. Again, there are so many out there. For simple QR Codes, like ones that link to a website, or offer text, I like goQR.me, which is free, and you don't need an account. 3. Click "url," and paste the website address into the box. Then click enter. 4. The QR Code will be shown at the right of the screen. Simply right click on the image, and select either copy image or save as, depending on how you wish to use it. 5. That's it. Easy peasy! OK, that's all fine and dandy, but why would I want to make a QR Code? How can I use this in my classroom? Well, that's a very good question! :) Here's an awesome YouTube video I came across as I was researching this question. It's only 2 minutes long, and worth a watch! So, there's one way to use QR Codes in the classroom - to link to Book Trailers! I absolutely LOOOOOVE this idea, and want to try it out very soon! Here are some other ways to use QR Codes with your students:
Some common problems with QR Codes are when the code becomes unreadable, likely if it's been crumpled or torn, or if the lighting is too poor. Don't laminate the codes, as the shine also makes them difficult for a device to read. If a website address is very long, it makes the QR Code very dense, and slows down the response time. To correct this problem, use a url shortener site like bitly.com. There are just so many great ideas out there! What's more, QR Codes are easy and free to create, portable, and there's a coolness factor to them that really grabs kids (and adults too!). It saves paper, and time too!
0 Comments
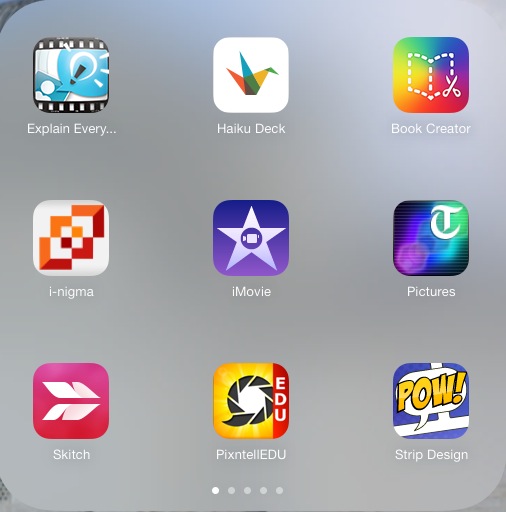 I'm feeling Christmassy these days, hence the title of this blog post. Now I can't get the tune out of my head. :) These 9 apps make up the first screen of the folder on my iPad titled Ed Tech. They are my "go-to" apps, the ones I use in almost any classroom, regardless of the age of the students or the subject.
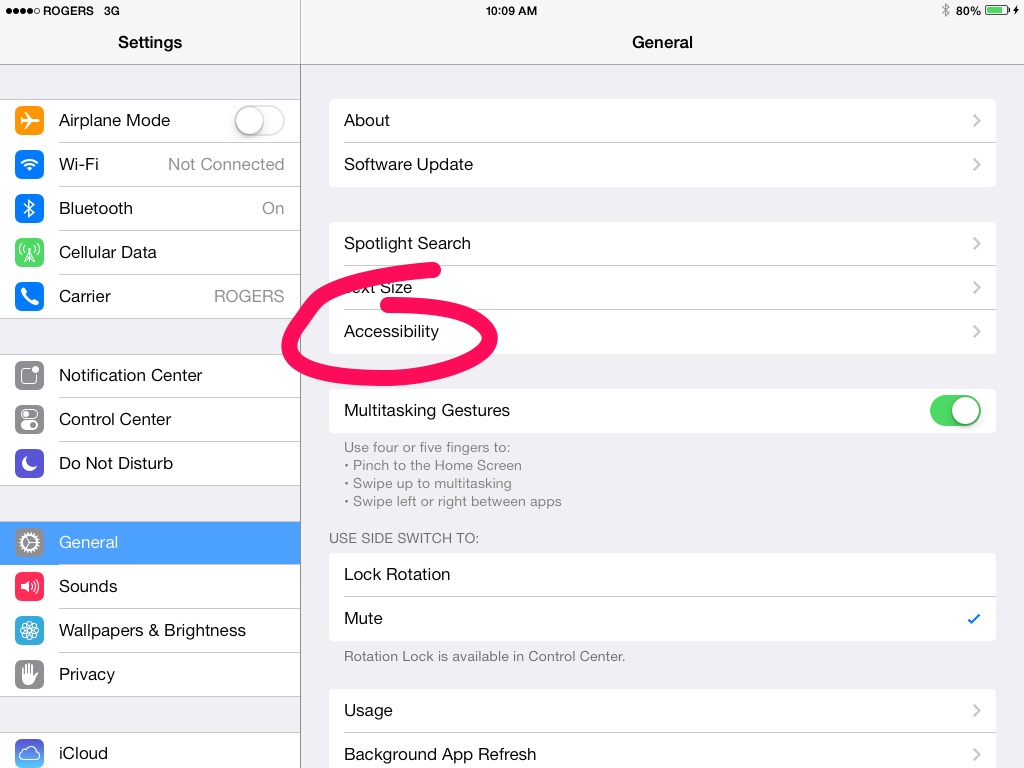
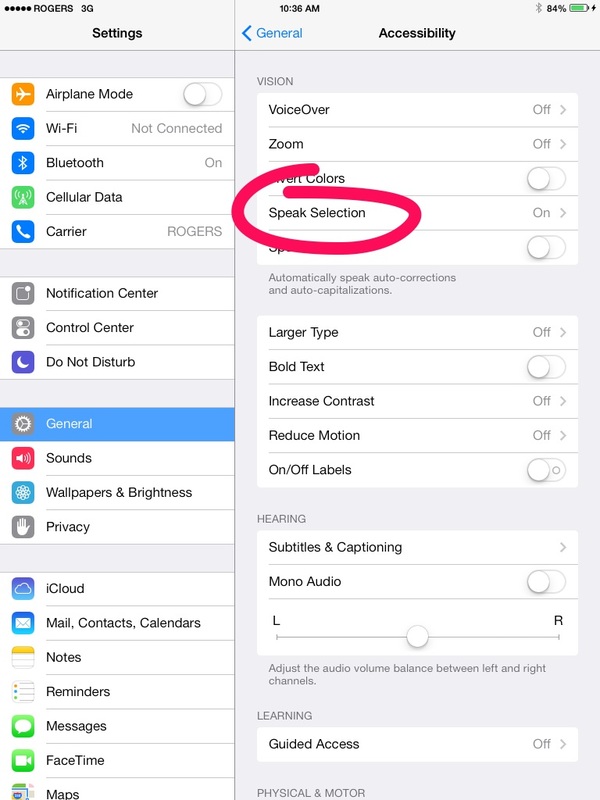
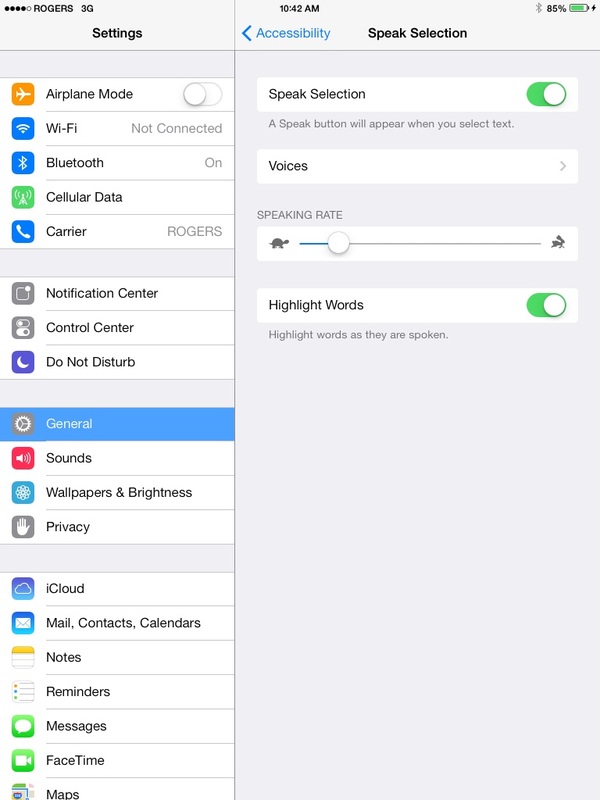
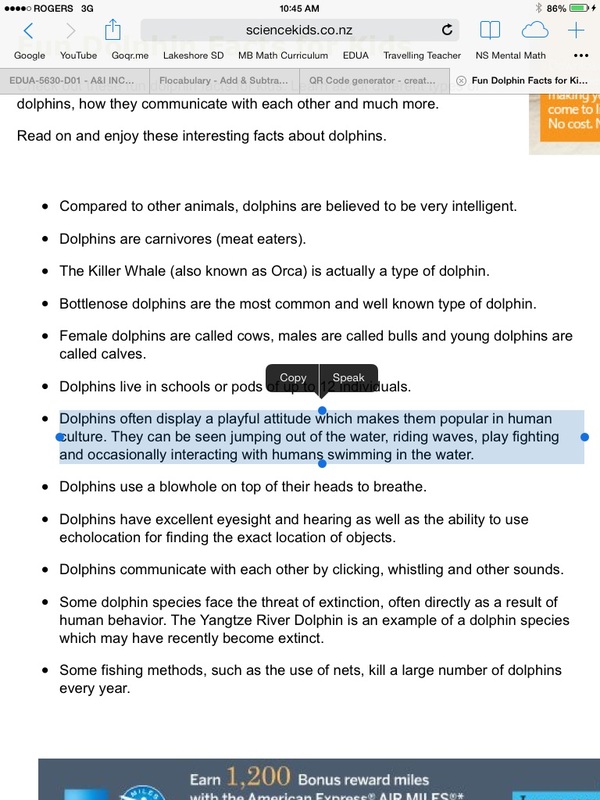
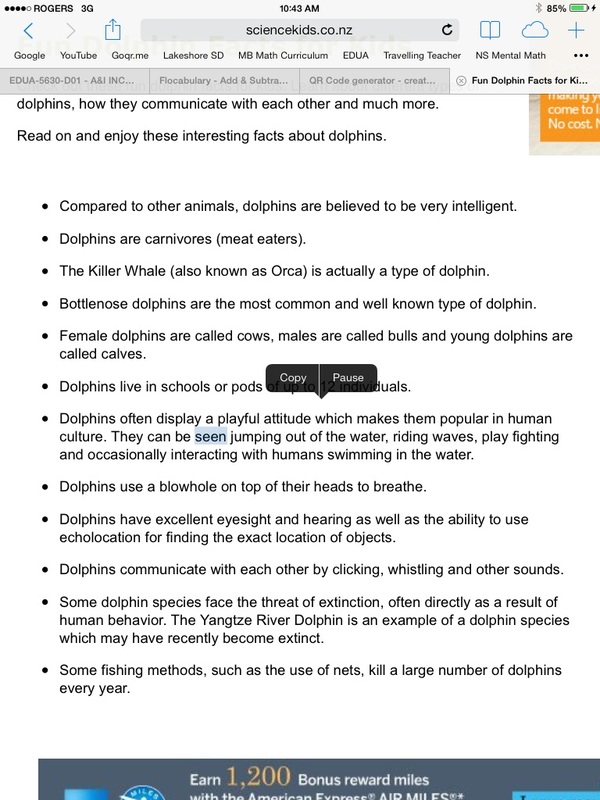
1. Explain Everything I wrote about this app a couple of months ago (click here), and I have often said that if I could have only one app this is the one it would be. This screencasting app is essentially a whiteboard on which you can add and record images, text, audio, video (the list is seemingly endless) to produce a video or picture. It is great for student projects, and many teachers use it for flipping their classroom, as well as for both summative and formative assessments. I have used it with students as young as Kindergarten age, and certainly high schoolers would find it beneficial for their projects as well. It is definitely a "must-have" for any classroom with iPads. $2.99. 2. Haiku Deck Haiku Deck is a presentation and slideshow maker, and is a wonderful alternative to PowerPoint presentations. What is so great about it, besides the beautiful images that can be uploaded, is that the text is limited (think Haiku poetry). This forces students (and adults) to choose only key words and phrases that each slide should have, and prevents students (and adults! LOL) from just reading what is on their slides (so boring!!). Free. 3. Book Creator Another app with endless creativity options! Easy enough for our youngest students to use, but with enough options that certainly middle schoolers would enjoy using it too. With this app, students add photos, images, text and audio to create storybooks. You have an unlimited umber of pages to use to create your story, and the finished product can be shared easily, and even opened in iBooks. Great for personal or class collaborative stories! $4.99, but worth it! 4. I-nigma I-nigma is a QR Code Barcode Reader app. I wrote about using this app in Guided Math classes a while ago (click here), but QR Codes can be used in so many valuable ways in education. A QR Code contains a link to text, image, URL, and more. Display a QR Code to have students all go to the same website, reducing valuable time having them type in the address, especially if it's a long one. Have students create a movie of their book review and then paste a QR Code inside the book so that when other people check out the book from the library, they get a link to that student's review. Endless possibilities. Hmm, I should blog about this one of these days... There are many free QR Code making websites out there but I like goqr.me the best. Free. 5. iMovie I am sure you've heard of iMovie before, so I won't go into too much detail on this one. Turn your photos, audio clips, music and video into movies or trailers. They can be as long or short as you like, and you can start from a blank slate or use one of the many templates Apple has made available. I particularly like them for book trailers. $4.99. 6. Telegraph Pictures I wrote about this app a while ago also (click here), and about how it can be used in an ELA classroom to boost reading comprehension by deciphering photos. This app uploads about 10 pictures daily, and they are photographs of top news stories (human interest too) from around the world, as seen in the London Telegraph. I love the current events connection. Free. 7. Skitch Skitch, by Evernote, is an app I learned about from Matt Gomez's blog. Basically you upload a photo to the app, and then add arrows, text, drawing, etc. It's great for younger students for labelling. I have used it in a Grade 3/4 class where the students uploaded photos of the earth, and then labelled the northern and southern hemispheres, equator and poles. Another great feature of this app is the blurring tool. If you have some students in your classroom whose parents/guardians have not given permission for their child's image to be posted online or in a public forum, the blur tool can be used to obscure that child's face so class pictures can still be used publicly. After the picture has been created, it can easily be shared. Free. 8. PixnTell With PixnTell, photos can be uploaded and arranged in a particular order. Then, use the recording feature to talk about the pictures. When you click create, the pictures and your recording are stitched together to create a video. Great for projects and so easy to use! And it's free! 9. Strip Designer This app creates comic strips. Choose from the wide array of templates and upload the pictures you want to use to tell your story. Then add speech bubbles and text, and any other stickers that would add to the personality of your story. Great for ELA, of course, but also for any presentations in other subject areas as well. $2.99. There are two iOS 7 settings that every teacher needs to turn on if they are using iPads with their students. The first one is called Speak Selection. With Speak Selection enabled, students can have text from websites (and many apps) read aloud to them. Here's how to do it: Step 1: Go to General on your Settings and choose Accessibility. Step 2: Next, select Speak Selection and make sure it is turned on. Step 3: Within Speak Selection, you have a few options. One is Speaking Rate. Make sure the rate is not too fast. You also have the option to highlight words as they are being spoken, which is a nice feature for students who are still learning to read, but older students may not want this feature, as they may feel that it is drawing attention to the fact that Speak Selection is being used. To use Speak Selection, highlight a section of text on a site. Immediately, a box opens with a couple of options. "Speak" is now one of those options. While the selection is being read, if you have chosen to highlight the words, you will see each word as it is read aloud (see picture, below right). You have the option to pause or copy the selection while listening. The text below is dolphin facts for kids from the website Science Kids. 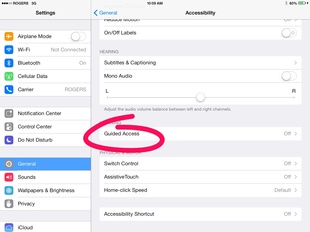 The other must-have setting you need is Guided Access, found under the Learning tab in Accessibility. With Guided Access turned on, you set up your students in an app and then activate the Guided Access. Now students cannot get out of this app without using a passcode. Not that I don't trust my students (insert smiley face here), but it is easy to get distracted at times. Here is how to do it: Step 1: Turn on Guided Access. Step 2: Select "Set Passcode." You will be asked to enter a 4-digit passcode twice. Make sure it is not the same passcode that you have used to unlock your iPad, as your students may already know that one! Step 3: Make sure the Accessibility Shortcut is turned on also.  That's it. Now, to use it, open the app that you want your students using. When in the app, triple click the home button on your iPad. You will see "Start" in the upper right hand corner of your screen. Tap Start. Your iPad is now locked in this app. To get out of the app, triple click the Home button again. You will be prompted to enter the passcode that you set with the Guided Access. Once you enter the passcode, you will see "End" in the top left of your screen or "Resume" in the top right. Make your selection and you're all set! If you have selected "End," you will see a message that states "Guided Access has ended."
I hope that's helpful! 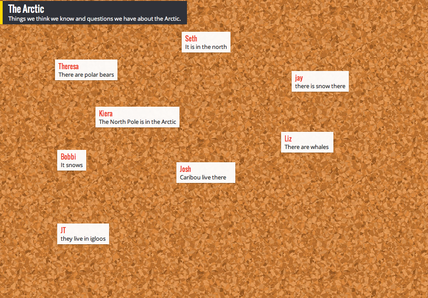 I'm sure as teachers we have all done the old standby KWL chart, in various forms. I've written students' ideas on chart paper, or had them write it themselves. The problem with this is that you can't easily manipulate their ideas after they've been recorded (although I have cut them apart and then sticky tacked them to another paper!). I've had them write on sticky notes so that we can rearrange the notes in a different layout later. The trouble with sticky notes is that they lose their stick after awhile, and the heat exchange system in my classroom created such a breeze that we were often collecting them from around the classroom! Padlet.com is the answer to these problems. Padlet (used to be known as Wallwisher) is like chart paper for the web. Once you've created an account (it's free!), create a wall and give it a name, using the settings along the right hand side of the screen. If you like, you can customize the url so that students can easily type in the address. Or, if you prefer, Padlet creates a QR Code for your wall immediately, so you could just project the QR Code and have students scan it with their iPad or other smart device. I would have my computer hooked up to the LCD projector so that everyone can see what's going on. Now students can add their own ideas to the wall by clicking somewhere on the wall. If you prefer, you can have students give their ideas to you and you type them (which may be easier for younger students). The picture above is the beginnings of our Arctic unit. I asked the students what they thought of when they heard about the Arctic. Once we have several ideas, the next step is to ask the students what they wonder about the Arctic. Then we sort our ideas. As the moderator, I have access to everyone's sticky notes, and can move them around on my computer. 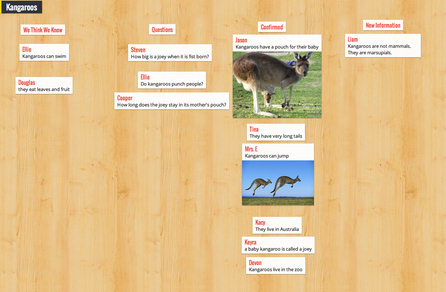 Here is another wall that we worked on together when we were learning about Australia. We did a class wall together, and then the students each created their own in preparation for their partner projects. I like using the heading "What We Think We Know," instead of "What we Know," because sometimes students' ideas are incorrect. After we have the first two columns created, we do some research, and then revisit our wall. Now we look at our "What We Think We Know" sticky notes, and if we've confirmed that this idea is correct, then we move it to a new column entitled "Confirmed." If we discover that the idea is actually a misconception ("I hope we make some mistakes, because that's how we learn!), we correct it and add it to the "New Information" column. I love this KWL version. I read about it in Tony Stead's book Reality Checks: Teaching Reading Comprehension with Nonfiction.
Padlet.com has some other nice features as well:
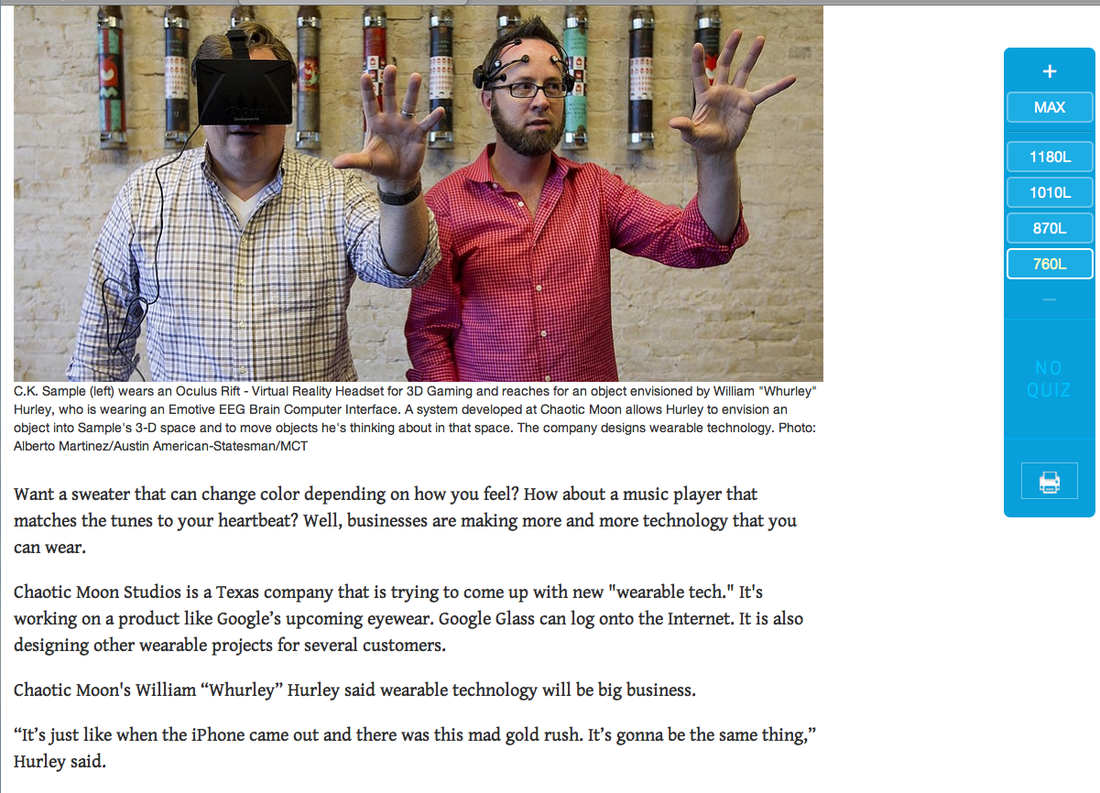
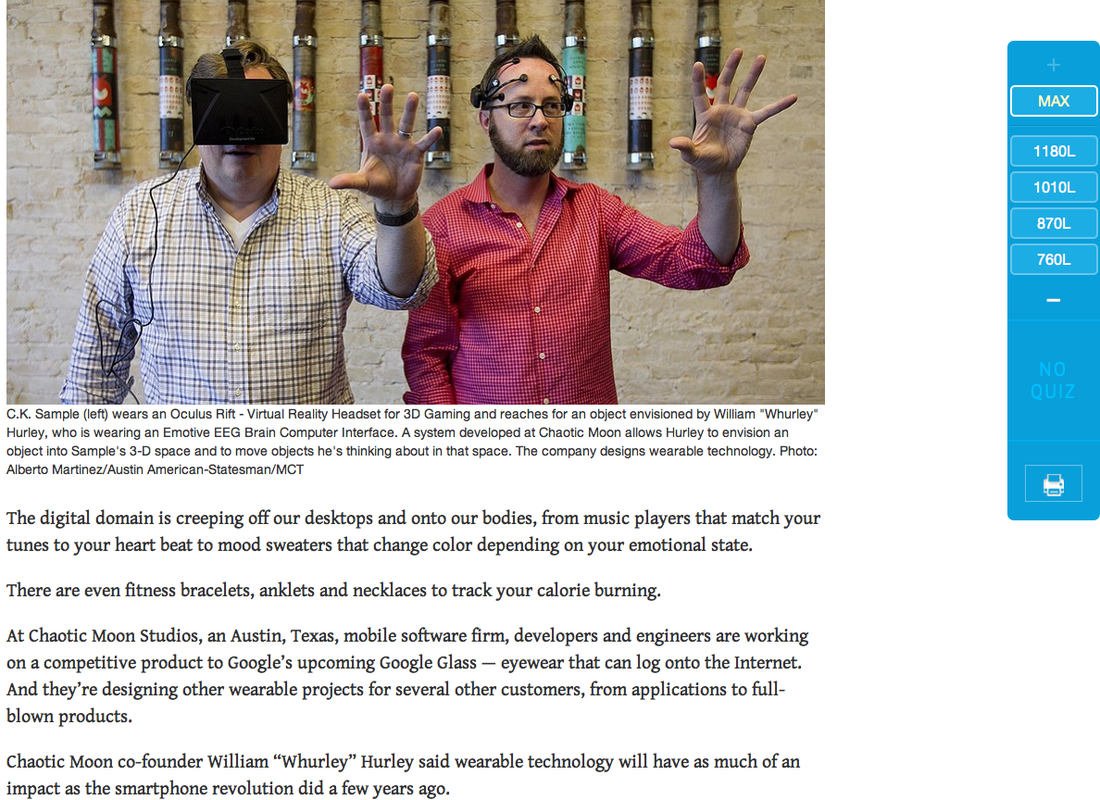
 It is not always easy to bring current events into the Early Years classroom, but at last I've found a way to do not only that, but to connect it with reading comprehension strategies. The Telegraph Pictures for iPad app features 12 pictures from news events around the world, taken the day prior to accessing them. The pictures are not only beautiful, but informative, interesting and even inspirational at times. Here's how I would use this in an Early Years or Middle Years classroom: 1. Choose one of the 12 new pictures and project the image in the classroom. Before the students see the image, tap on the picture so that the caption is hidden. 2. When the children come into the room, have them take paper (could be a worksheet, or could be just scrap) and have them record the following: 4 details, 3 questions, 2 connections and 1 inference. 3. After a few minutes (no more than 10), have the students turn and talk to their elbow partner. 4. Then, invite pairs of students to share their ideas with the rest of the class. Discuss how looking for important details, questioning, making connections and inferring are all reading comprehension strategies that will help them to be a better reader. 5. At the end of the class, tap the image again and the caption will be seen. Now it's time for a discussion about an event from the previous day. The next wonderful find I want to share with you is the Newsela website. This website publishes news articles related to current events, science, kids' interest, war and peace, and more. The most exciting thing about this website is the toggle at the right hand side of the screen, which allows the reader to adjust the text in the article to a higher or lower reading level. Most texts range from Gr. 4 to Gr. 12 levels, and the adjustment does not change the content of the text, nor the photo, just the readability. So students sitting right beside each other would have no idea at which level their neighbour is reading, as the page looks the same. The two screen shots above are at a Gr. 4 and a Gr. 12 level, respectively. This is a free account that teachers create. A student code is then generated for students, and teachers can assign specific articles for their class to read. New items are added regularly. There is an option for a quiz following the article, should teachers so choose. Wouldn't it be wonderful if all websites were created with this awesome feature?!!!
|
Lori EmilsonTravelling Curriculum Support Teacher Archives
April 2017
Categories
All
|
 RSS Feed
