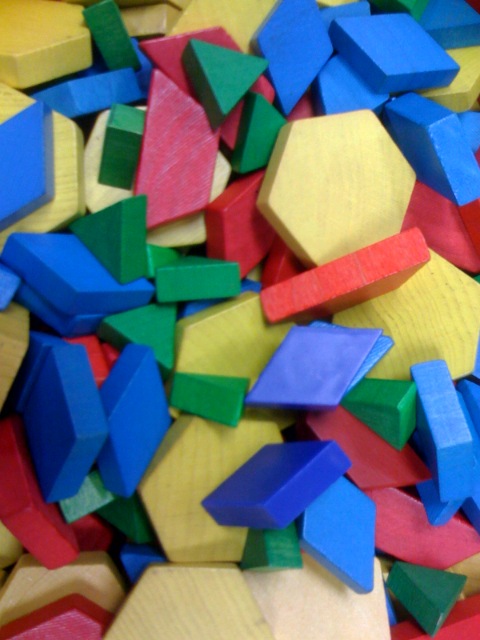
 I attended an awesome workshop last week. The presenter was Dr. Cathy Marks Krpan, and the topic was communication in math instruction. This workshop really brought together everything I've learned about differentiated math instruction and cooperative learning. I have used clotheslines in my classroom before. I've had students put numbers in order, and I've even used them in Word Work by asking students to arrange words into sentences (I even wrote the sight words on clothing-shaped paper!). But this goes one step further, and I tried it out on a Grade 8 class this week, as shown in the picture above. While working with a small group, and another group was working together on percentage task cards, one group of students was at the clothesline, which I draped across the whiteboard at the front of the classroom. The cards I had prepared included percentages, decimal fractions, regular fractions and representations of parts of 1. The students had to decide collaboratively which cards went where in order to place them from least to greatest. The cards that were equal could be clipped together. The language that was being used as they debated over which cards went where was some of the best discussion I've heard in a math classroom in a long time! It was wonderful, to say the least! This is an activity that could be used right across the grades. Kindergarten: Numerals, dot arrangements and ten frames. Grade 2: Numerals, number words, base ten blocks and addition/subtraction equations. Grade 5: Multiplication/Division equations, arrays, and numerals. Students could make patterns on the clothesline, skip count, order integers, sort shapes by attribute... I highly recommend this book. It is Math Expressions: Developing Student Thinking and Problem Solving Through Communication by Dr. Cathy Marks Krpan. 
3 Comments
Many teachers struggle daily with differentiating their math instruction in order to meet the needs of all the learners in their classrooms. Guided Math is one way to provide the differentiation needed, as it allows the teacher to work with small groups of students while the rest of the class is engaged in meaningful math tasks. There is no cookie cutter solution, however, and teachers must find the method that works best for them. Here are a few structures I have learned about, based on a 75-minute math class (in Manitoba, math instruction is recommended to be 15% of the school day for Grades 1-6 and 17% for Grades 7 and 8). 1. 15 minute mini lesson, followed by 4 work stations. One of the work stations is with the teacher, and the other 3 are practice stations (math games, using manipulatives, math project, math literature, math with technology, etc.). Students spend approximately 15 minutes at each station, and students are grouped by like ability. Students rotate through each station once per class. Photo credited to: Enoch Lau 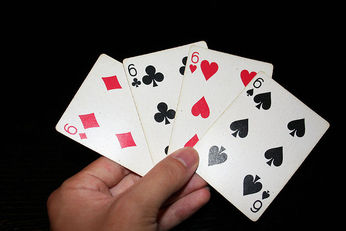 2. 30 minute lesson with the whole class, which may be teaching a problem solving strategy or mental math activity. Students then choose 2 math stations that they work on for the next 45 minutes (20-25 minutes per station). Students make the choice themselves, but must go to all the possible stations within a 1-week period. Teachers pulls 3-6 students at a time to work on a math outcome that needs review or extension. Photo credited to: kfergos Photo credited to: MrSchuReads 3. Students have been taught to start a math task independently (such as Nifty Number, Toad Code, Math jobs) or there is another adult in the room (co-teacher or Educational Assistant). When the task is completed, students go to a math work station of their choice. While this is happening, the teacher is calling 3-6 students together to work with him/her on a math topic.
There are lots of options about what the work stations or centres look like too. MATH M=Math Games A=At Your Desk (independent work or reading math literature) T=Teacher Time H=Hands-On (using manipulatives, working on projects, etc.) BUILD B=Buddy Games U=Using Manipulatives I=Independent Reading/Writing/Work L=Learning About Numbers D=Doing Math (practice with a new strategy) Math Daily 5 Math by Myself Math With Someone Writing About Math Math Technology Math Group This topic is so huge! There's no way I can write about it in one post. I'll be posting more info at another time. Watch for it! 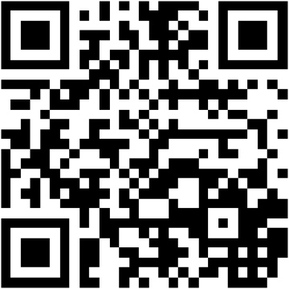 I've been thinking about Guided Math a lot lately. This is something I've modelled in many classrooms over the last year and a half that I've been in this support role, and I am attending a workshop on Tuesday on Guided Math Gr. 3-6, so I hope to blog more on this topic next week. Today I want to talk about how the iPad and, more specifically, the use of QR Codes can play a part in Guided Math workstations. One of the stations in your rotation during Guided Math may be related to technology. Certainly the use of math-specific apps is popular for this. Some of the great math apps for early years students (ones that I like, anyway) include Subitize Tree, What's Hiding and Kakooma. But there are so many wonderful activities available on the web. The problem is that often the web address is long, and has to be entered exactly or it doesn't work, which is a real problem for our youngest learners for sure. Here's where QR Codes come in. 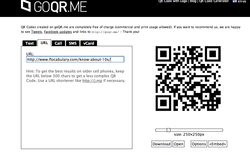 QR stands for Quick Response. I'm sure you've seen them around. They got their start mainly for advertising purposes, but they can play a wonderful role in education too, and it's so easy! You will need to install a QR Code reader on your iPad, iPod, or whatever mobile device you're using in your classroom. I like i-nigma, which is free. To read a code, you simply hold your device up to the code, and the program automatically reads it and takes you to that website. It's like magic, honestly! To make a QR Code, go to any of the free QR Code making websites. I like GOQR, wich is in the picture above. QR Codes can be made to display a text message, a phone number, video, audio file, and so much more, but for now I'll just talk about how to use it for websites. Open the "URL" tab on the site, and use copy/paste to insert the website address you want your students to visit. Click enter and the QR Code is displayed immediately. Now right click, and copy or save the image. That's it. Done. Easy-peasy. The QR Code at the top of the page, once read, will take you to a Flocabulary video of the rap song "Know About 10s." I had the students take their iPads, use i-nigma to read the QR Code which I had printed out on a sheet of paper, and then they could watch and sing along to the song, which reinforces the numbers that add up to 10. (Flocabulary is another new find of mine. It's subscription-based, but has a free trial, and many of the videos can be found on YouTube as well.) This was done in a Gr. 1/2 classroom, and the students had no trouble using the QR Code. 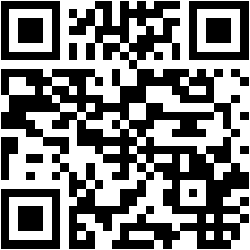 Another day this week I was in a Grade 8 classroom. We were doing a project calculating the amount of sugar in various drink containers, and I wanted the students to read up on sugar consumption. I found a great infographic from Dr. Joe Today that I wanted them to read and analyze. I could have printed off the infographic, or read it to them, but instead I created the QR Code at the left and the students went straight to the site that housed the infographic, and read it on their own. In this case, I projected the QR Code onto the whiteboard, which worked well.
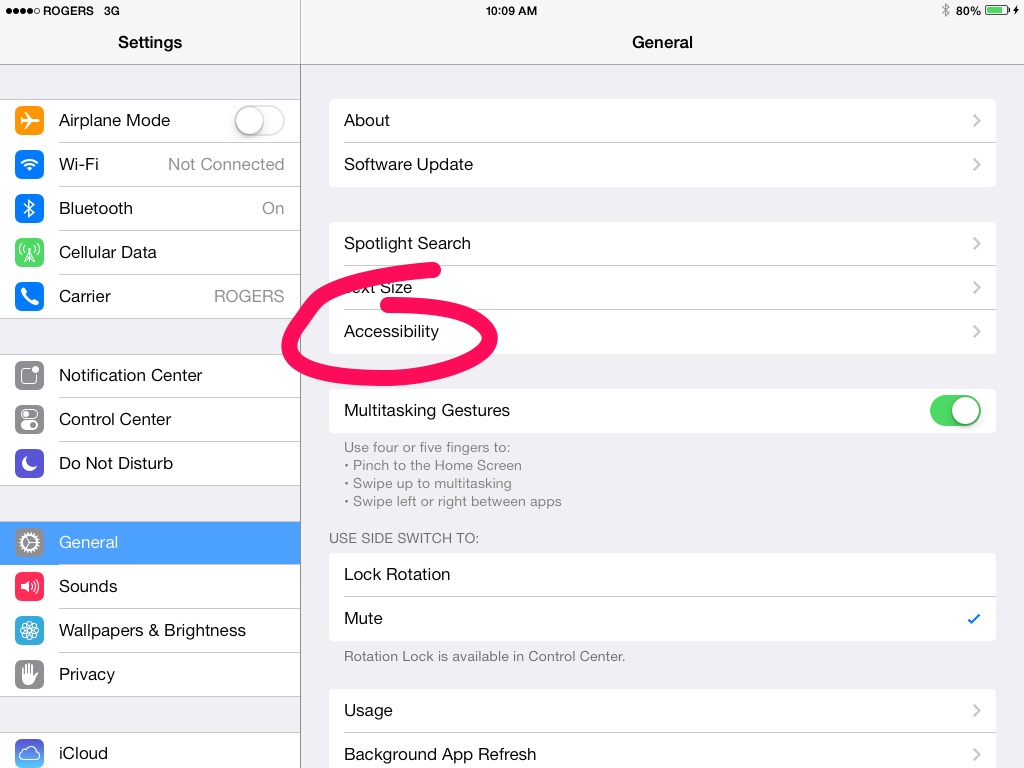
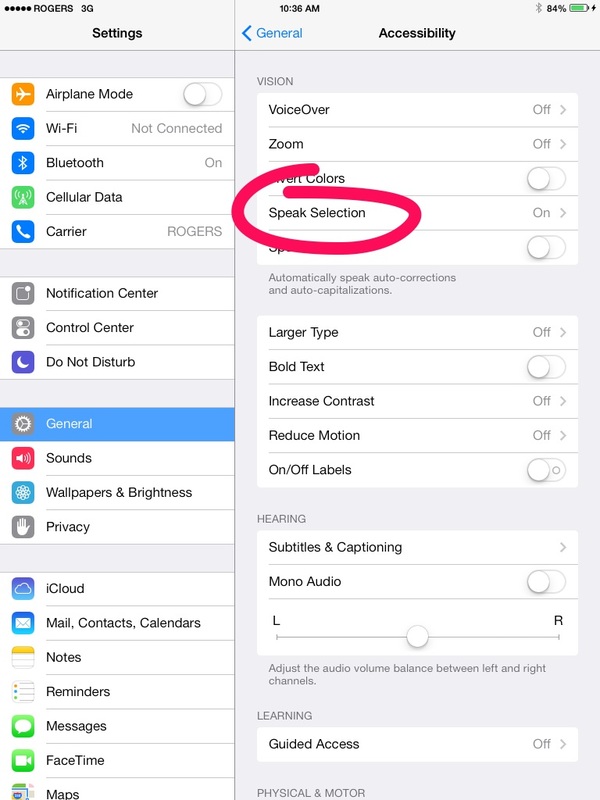
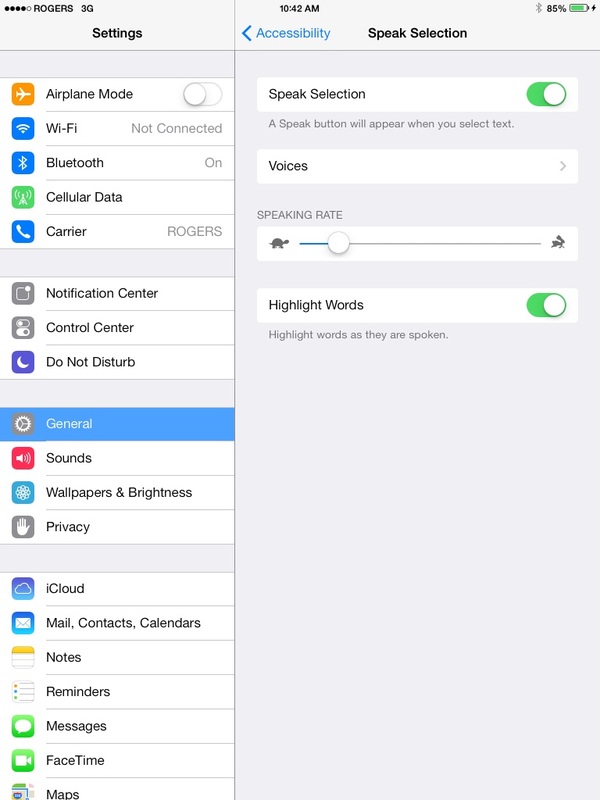
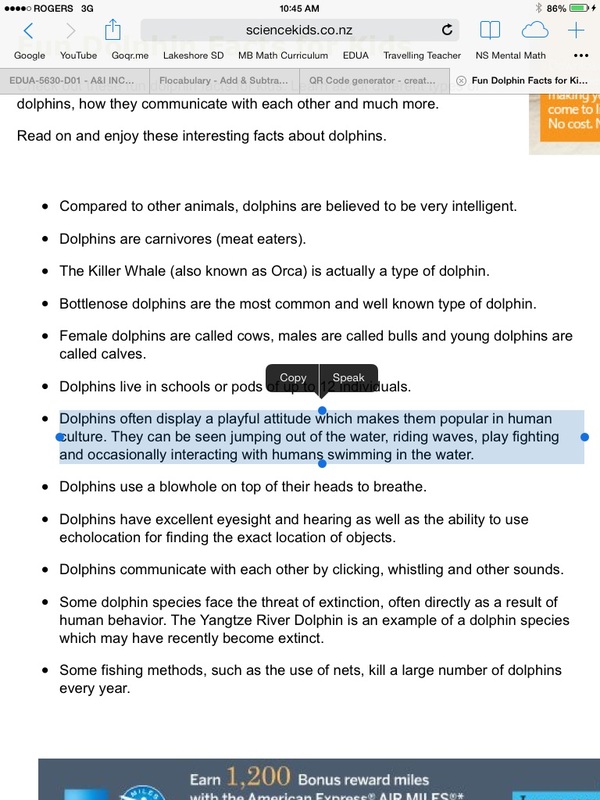
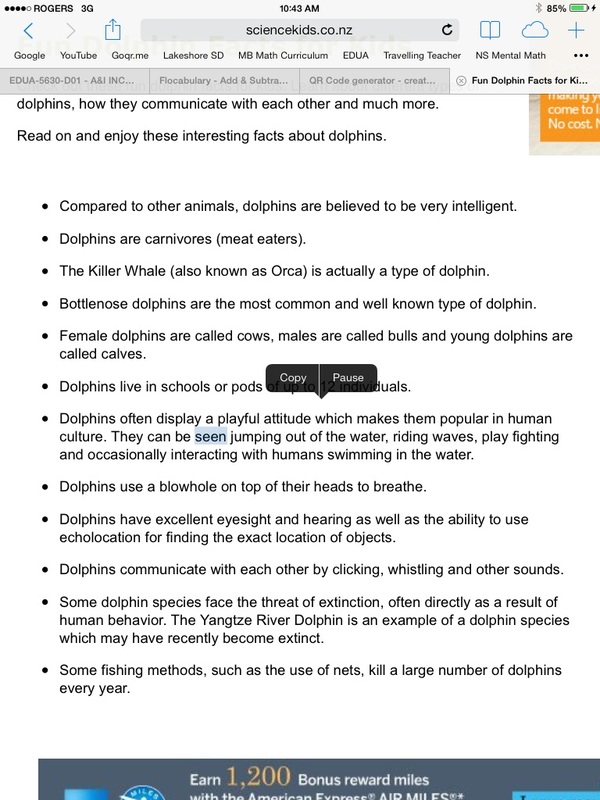
I love using QR Codes with students! Not only does it make going to websites fast and easy, but there's also a certain coolness factor surrounding them. Check it out. It's really easy! There are two iOS 7 settings that every teacher needs to turn on if they are using iPads with their students. The first one is called Speak Selection. With Speak Selection enabled, students can have text from websites (and many apps) read aloud to them. Here's how to do it: Step 1: Go to General on your Settings and choose Accessibility. Step 2: Next, select Speak Selection and make sure it is turned on. Step 3: Within Speak Selection, you have a few options. One is Speaking Rate. Make sure the rate is not too fast. You also have the option to highlight words as they are being spoken, which is a nice feature for students who are still learning to read, but older students may not want this feature, as they may feel that it is drawing attention to the fact that Speak Selection is being used. To use Speak Selection, highlight a section of text on a site. Immediately, a box opens with a couple of options. "Speak" is now one of those options. While the selection is being read, if you have chosen to highlight the words, you will see each word as it is read aloud (see picture, below right). You have the option to pause or copy the selection while listening. The text below is dolphin facts for kids from the website Science Kids. 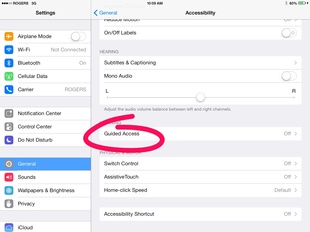 The other must-have setting you need is Guided Access, found under the Learning tab in Accessibility. With Guided Access turned on, you set up your students in an app and then activate the Guided Access. Now students cannot get out of this app without using a passcode. Not that I don't trust my students (insert smiley face here), but it is easy to get distracted at times. Here is how to do it: Step 1: Turn on Guided Access. Step 2: Select "Set Passcode." You will be asked to enter a 4-digit passcode twice. Make sure it is not the same passcode that you have used to unlock your iPad, as your students may already know that one! Step 3: Make sure the Accessibility Shortcut is turned on also.  That's it. Now, to use it, open the app that you want your students using. When in the app, triple click the home button on your iPad. You will see "Start" in the upper right hand corner of your screen. Tap Start. Your iPad is now locked in this app. To get out of the app, triple click the Home button again. You will be prompted to enter the passcode that you set with the Guided Access. Once you enter the passcode, you will see "End" in the top left of your screen or "Resume" in the top right. Make your selection and you're all set! If you have selected "End," you will see a message that states "Guided Access has ended."
I hope that's helpful! 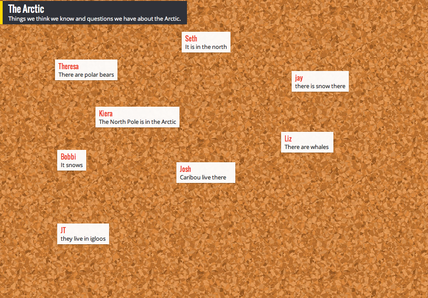 I'm sure as teachers we have all done the old standby KWL chart, in various forms. I've written students' ideas on chart paper, or had them write it themselves. The problem with this is that you can't easily manipulate their ideas after they've been recorded (although I have cut them apart and then sticky tacked them to another paper!). I've had them write on sticky notes so that we can rearrange the notes in a different layout later. The trouble with sticky notes is that they lose their stick after awhile, and the heat exchange system in my classroom created such a breeze that we were often collecting them from around the classroom! Padlet.com is the answer to these problems. Padlet (used to be known as Wallwisher) is like chart paper for the web. Once you've created an account (it's free!), create a wall and give it a name, using the settings along the right hand side of the screen. If you like, you can customize the url so that students can easily type in the address. Or, if you prefer, Padlet creates a QR Code for your wall immediately, so you could just project the QR Code and have students scan it with their iPad or other smart device. I would have my computer hooked up to the LCD projector so that everyone can see what's going on. Now students can add their own ideas to the wall by clicking somewhere on the wall. If you prefer, you can have students give their ideas to you and you type them (which may be easier for younger students). The picture above is the beginnings of our Arctic unit. I asked the students what they thought of when they heard about the Arctic. Once we have several ideas, the next step is to ask the students what they wonder about the Arctic. Then we sort our ideas. As the moderator, I have access to everyone's sticky notes, and can move them around on my computer. 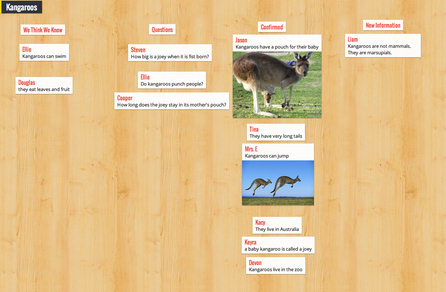 Here is another wall that we worked on together when we were learning about Australia. We did a class wall together, and then the students each created their own in preparation for their partner projects. I like using the heading "What We Think We Know," instead of "What we Know," because sometimes students' ideas are incorrect. After we have the first two columns created, we do some research, and then revisit our wall. Now we look at our "What We Think We Know" sticky notes, and if we've confirmed that this idea is correct, then we move it to a new column entitled "Confirmed." If we discover that the idea is actually a misconception ("I hope we make some mistakes, because that's how we learn!), we correct it and add it to the "New Information" column. I love this KWL version. I read about it in Tony Stead's book Reality Checks: Teaching Reading Comprehension with Nonfiction.
Padlet.com has some other nice features as well:
|
Lori EmilsonTravelling Curriculum Support Teacher Archives
April 2017
Categories
All
|
 RSS Feed
