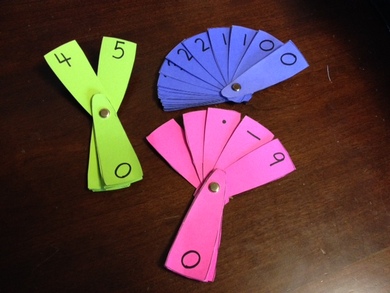
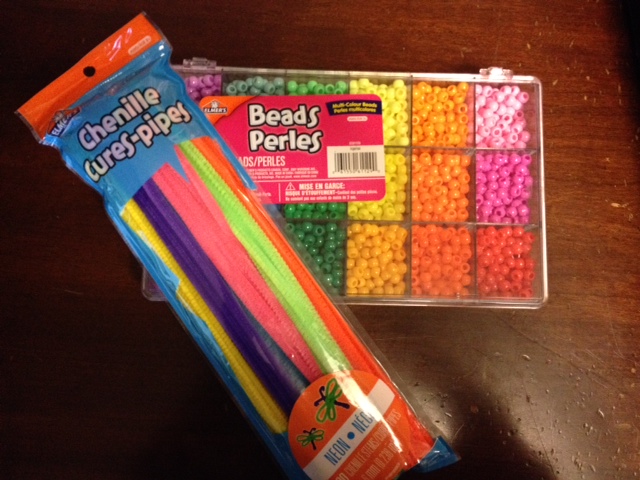
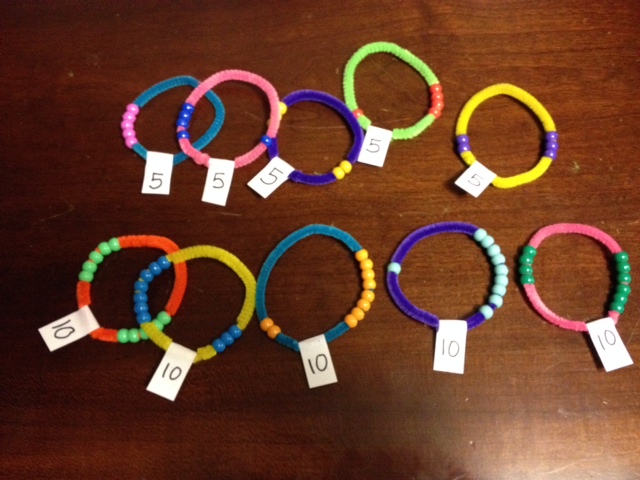
 Project #1: Number Fans I use number fans from Kindergarten through Grade 8. I use the number fans for students to show me the answer when I give them mental math questions. I include two of each digit (0-9) so that double digit numbers can be shown. At the back of the fan I usually include a blank strip because sure enough, at least four children will lose a digit (a numeral digit, not a finger lol) and it's easier to just write the missing digit on a blank strip than to find the correct colour cardstock, then cut and add it to an existing fan. Trust me on this. For middle years students, I also include a decimal and sometimes a minus sign, to indicate negative numbers. Here's how to make a number fan: 1. Photocopy a pattern onto coloured cardstock. Copy paper is too flimsy. There are many patterns available online. Here is one from Kindergarten Lifestyle: Number Fan. Make sure you have two of each digit for each student. 2. The most tedious part of this project - cut out all of the cards and punch a small hole near the bottom. 3. Arrange the digits in the following order: 0, 0, 1, 1, 2, 2... Attach the strips together with a paper fastener. To use the fans, I ask the students a mental math question. They must silently figure out the answer in their head, and then show me the answer with their fans. I write down all of the answers that I see, and then call on a student to explain their answer to me. Then we discuss the other answers that I saw and discuss why that answer might have been given. In other words, think about others' thinking. What was done wrong? Why do you think that person did that? Project #2: Number Bracelets I use number bracelets with Kindergarten and Grade 1 students. I introduce the bracelets with 5 beads, and then 10. To make one: 1. Cut about 5 cm from a pipe cleaner (chenille stem). 2. String beads of the same colour onto the pipe cleaner. 3. Shape the pipe cleaner into a circle and wrap the ends together, forming a bracelet. It doesn't matter if the bracelets don't fit your students' wrists, as they don't wear them. 4. Fold a mailing label over the twisted ends so that little fingers don't take them apart, and won't poke themselves. 5. Write the number of beads on each side of the label. That's it! Easy peasy. In Kindergarten, I would make a bracelet for each student, starting with 5 beads. Ask how many beads are on the bracelet. How many are on each side? Can you move the beads around to change the number of beads on each side? Discuss, discuss, discuss! Once the students have a good grasp of all the ways to make 5 (that part-part-whole understanding is soooo important, so don't rush!), move on to the 10 bead bracelets. In Grade 1, students can record all the ways to make each number. If you are using Math Work Stations, this is a great activity, and you won't need one for each student, although you could add number bracelets for each number up to 10. You could also make cards of the form: 4 + __ = 10. Donna Boucher, that wonderful math coach from Math Coach's Corner has a whole unit related to number bracelets that I'm sure you would enjoy. You can find it here: Developing Fluency with Number Bracelets. 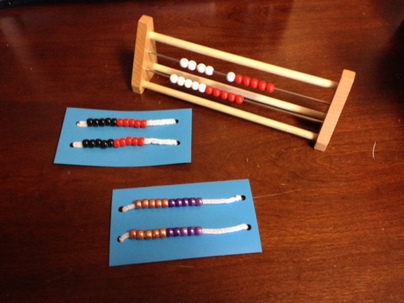 Project #3: Rekenrek Many people relate a rekenrek to the abacus from school days of long ago. They are similar, and rekenreks can be purchased in many different sizes. The size I prefer to use is two bars of 10. They vary in price, but are usually around $5 each. Here's one I found online from Canadian Education Warehouse. The purchased ones are very durable, of course, but if money is an issue (and in education, when isn't money an issue?) here's one way to make your own: 1. Cut from craft foam or heavy plastic (I used craft mats that I purchased from a Dollar store, or a plastic binder cover would work too) rectangles measuring about 3 x 5 inches. 2. Use a hole punch to make four holes, two at each end. 3. Count out 10 beads each of two colours. 4. Thread 5 beads of one colour and 5 beads of the second colour onto a pipe cleaner, or chenille stem. Do the same to a second pipe cleaner. 5. Thread the pipe cleaner through the holes of the rectangle as shown above and bend the ends over at the back. Add a drop of hot glue or sticky tape to hold the ends in place. Rekenrek activities are the same types of learning activities you would use with two ten frames. I will be writing a blog post in the near future about using the rekenrek in the classroom, but here is a great resource you can use now from K-5 Math Teaching Resources. 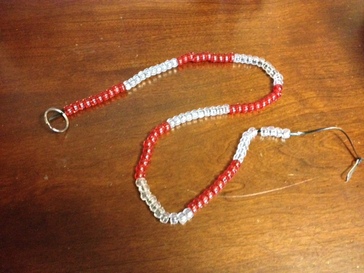 Project #4: 100 Bead String
The last project for this post is the 100 bead string. The name is pretty self-explanatory. Basically, it's a cord about 1 metre long (a little less is fine) with 100 beads of two colours, alternating colours in groups of 10. I either make a loop at each end of the cord, or attach some sort of key ring. The cheapest I have found these online is $12, and I knew I could make them cheaper than that! I used plastic cord that I bought from Walmart, but a shoelace would work well too. I purchased two large bags of single colour pony beads there as well. Students use the bead string in a similar way that they would use a 100 Chart. To add two numbers together, simply count out the first number (using their knowledge of tens and ones) and then add the second number. Now count the beads (easy to count them in groups of 10!) to determine the sum. Subtraction is done the same way. One great strength of the 100 bead string is when you are making 100 or subtracting from 100, a very useful strategy for making change when shopping. For example, I have $1. I spend 38 cents. How much change will I get back? Many of my Grade 2 and 3 students preferred using the bead strings to the 100 Chart if they were kinaesthetic learners. I made enough for each student in my class.
5 Comments
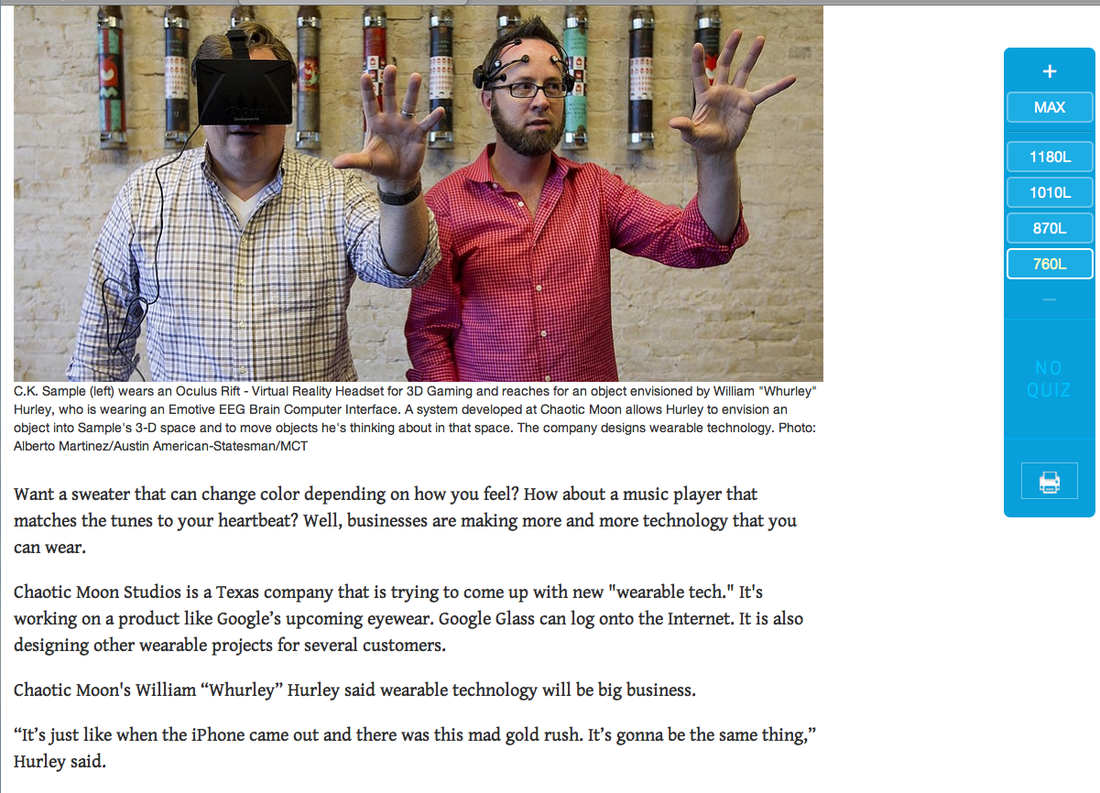
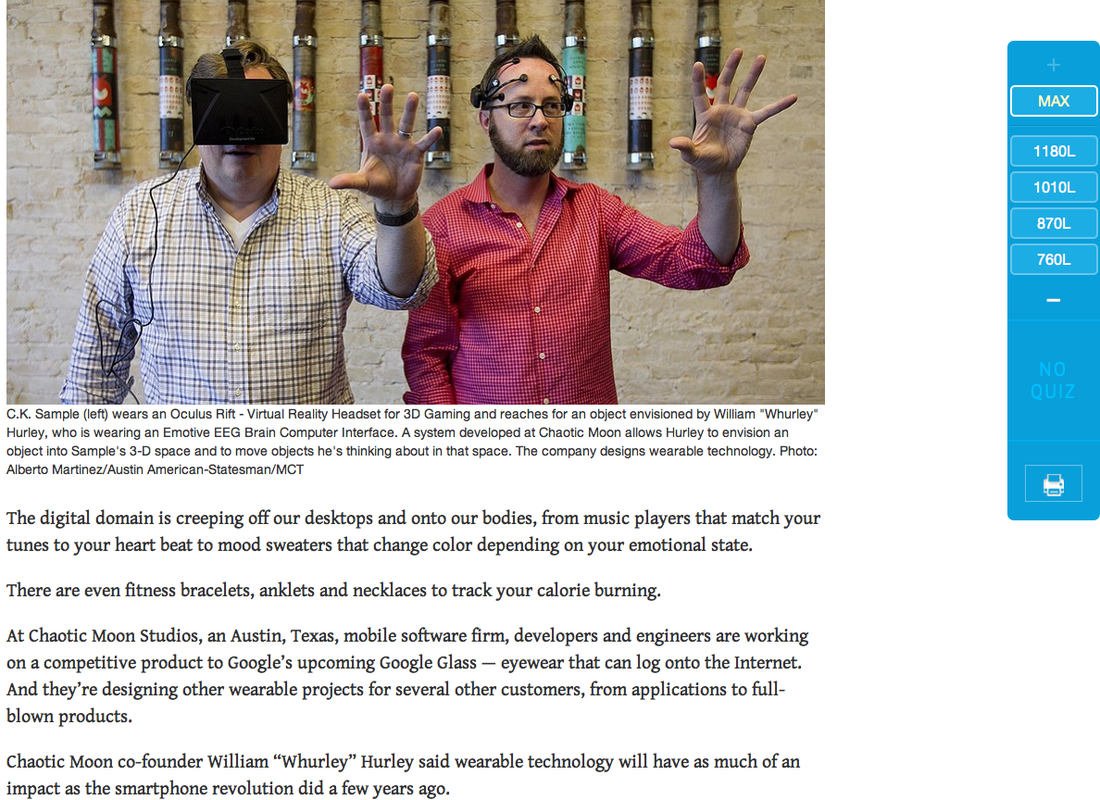
 It is not always easy to bring current events into the Early Years classroom, but at last I've found a way to do not only that, but to connect it with reading comprehension strategies. The Telegraph Pictures for iPad app features 12 pictures from news events around the world, taken the day prior to accessing them. The pictures are not only beautiful, but informative, interesting and even inspirational at times. Here's how I would use this in an Early Years or Middle Years classroom: 1. Choose one of the 12 new pictures and project the image in the classroom. Before the students see the image, tap on the picture so that the caption is hidden. 2. When the children come into the room, have them take paper (could be a worksheet, or could be just scrap) and have them record the following: 4 details, 3 questions, 2 connections and 1 inference. 3. After a few minutes (no more than 10), have the students turn and talk to their elbow partner. 4. Then, invite pairs of students to share their ideas with the rest of the class. Discuss how looking for important details, questioning, making connections and inferring are all reading comprehension strategies that will help them to be a better reader. 5. At the end of the class, tap the image again and the caption will be seen. Now it's time for a discussion about an event from the previous day. The next wonderful find I want to share with you is the Newsela website. This website publishes news articles related to current events, science, kids' interest, war and peace, and more. The most exciting thing about this website is the toggle at the right hand side of the screen, which allows the reader to adjust the text in the article to a higher or lower reading level. Most texts range from Gr. 4 to Gr. 12 levels, and the adjustment does not change the content of the text, nor the photo, just the readability. So students sitting right beside each other would have no idea at which level their neighbour is reading, as the page looks the same. The two screen shots above are at a Gr. 4 and a Gr. 12 level, respectively. This is a free account that teachers create. A student code is then generated for students, and teachers can assign specific articles for their class to read. New items are added regularly. There is an option for a quiz following the article, should teachers so choose. Wouldn't it be wonderful if all websites were created with this awesome feature?!!!
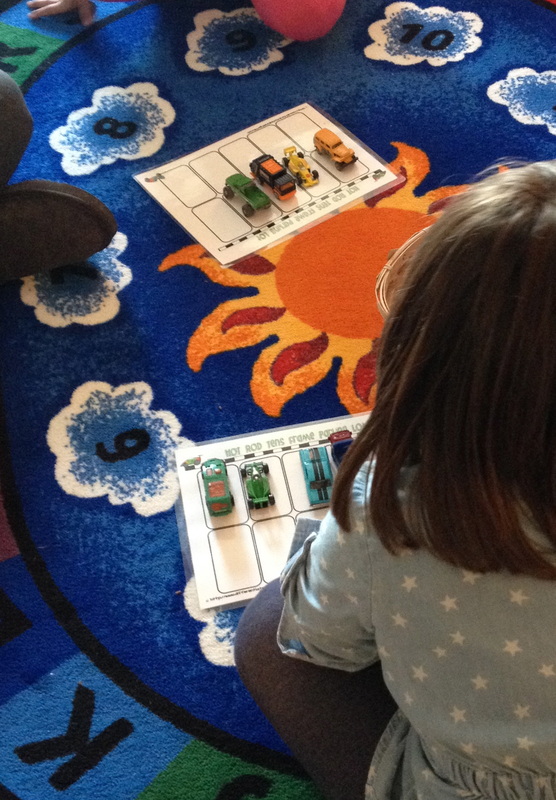
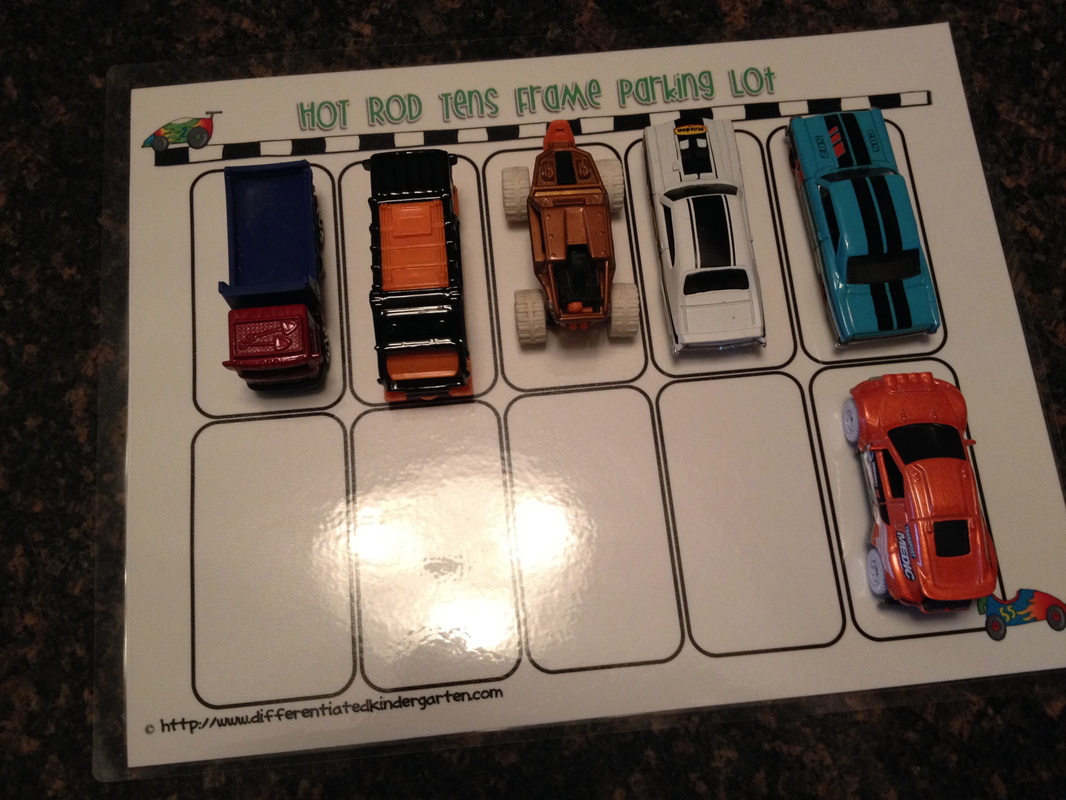
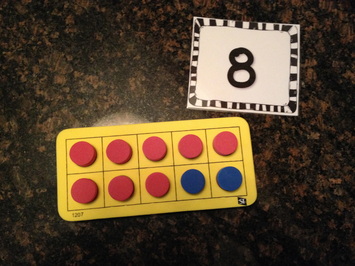 I was fortunate enough to spend some time in a Kindergarten classroom today, demonstrating the use of ten frames. A ten frame is a 5 x 2 array, usually positioned sideways, and filed with counters arranged from top to bottom, left to right. Ten frames are wonderful creations that can be used to teach number recognition, counting, subitizing and beginning addition and subtraction skills. Today I introduced ten frames to the little Kindies that I was working with. We practiced counting the blue and red counters that we were using, being very careful to match one-to-one as we counted. Then we practiced recognizing numerals on flashcards, filling our ten fames, and saying how many more we needed to make ten. Once we had the hang of how ten frames work, we were ready for some centres. One group worked with me. We turned a flashcard over, identified the numeral and counted out counters as we filled our ten frame with that many counters, all the same colour. Then we estimated how many more we would need to fill in the rest of the ten frame. After we agreed on an estimate, we filled it up using a second colour of counters. We talked about how ten is a very special number, and we need to know how many make ten. In the picture above, we learned that 8 and 2 make 10! 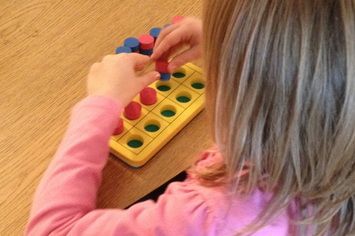 I love the ten frames set that I purhased last year. They are made of foam and have a magnetic backing in case I want to demonstrate to the class using the magnetic whiteboard. The foamy counters are blue on one side and red on the other. I purchased these from Spectrum. One of the other groups was working with the Hot Red Ten Frames that I purchased from Teachers pay Teachers. This set comes with car cards that may be placed on the mats, but the kids prefer using "real" cars (they're more fun)! So long as the cars aren't zooming around the carpet, I'm fine with that. At this centre, the students rolled a dice to see how many cars to start with. Then, just like the other group, they stated how many more cars they needed to fill the "parking lot," and then proceeded to park the cars while they confirmed their estimate. 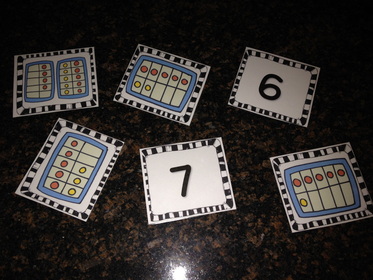 The third and final group of students was playing Memory with another set of ten frame cards that I purchased from Teachers pay Teachers. Today we just used ten fames and numerals from 1-10, but you can see from the picture that double ten frames are included in the set as well.
At the end of math centre time, we practiced some subitizing. I flashed a ten frame card to the students and challenged them to name how many dots were on the card without allowing enough time for them to count the dots. This recognition of knowing how many at a glance is called subitizing. if you are interested in using ten frames with your class (recommended for use with Kindergarten to Grade 2), here is an excellent resource: It Makes Sense! Using Ten-Frames to Build Number Sense by Melissa Conklin. Click here if you would like to purchase this awesome book from Amazon. 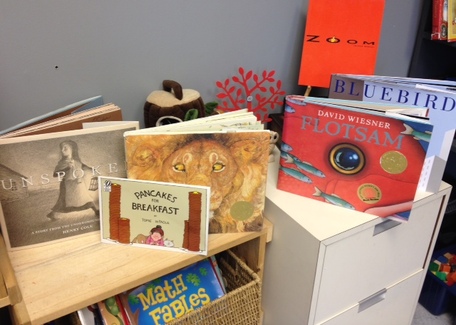 Last week I blogged about the screencasting app Explain Everything, and I'm still thinking about all the possibilities of using screencasting in the classroom. I've been a huge fan of wordless picture books for years. Children's literature with beautiful illustrations has always been a draw for me, and now that I am not in the classroom and my children are all grown, I really have no excuse to keep on buying these books, but I do anyway. I have not yet tried this in the classroom, but I'm eager to give it a go some day. I'd like to take pictures of some of the pages in the book, and then have the children's voices recorded as they tell the story. Older students could even add the text and narrate at the same time. With Explain Everything, students could add snippets of video related to the topic of the story, or add to the illustrations! I am amazed and appreciative of an author's ability to tell a story through pictures alone. I've come across some wonderful ones, and I'd like to share them with you. Unspoken: A Story from the Underground Railroad by Henry Cole is the story of a little girl helping a runaway slave, told in gorgeous pencil illustration alone. No words, no color. Imagine adding historic video from slavery times, and even some haunting music. Gives me chills. The Lion and the Mouse by Jerry Pinkney is Aesop's fable told in stunning illustrations against the backdrop of the African Serengeti. I can hear African drums as children's voices retell this message that no act of kindness is ever wasted. Pancakes for Breakfast by one of my favorite authors Tomie de Paola is a story young students would find very appealing in its humour. The little old lady is determined to make pancakes against all odds. Hmm... should we add a recipe? How to make maple syrup? David Weisner has written many wordless picture books, all with beautiful, full-color illustrations. Flotsam is the story of a little boy who is beach-combing and finds an underwater camera. The pictures on the camera lead him on a magical adventure in his imagination. Wonderful writing prompts galore in this one! Weisner has written some other remarkable wordless books, including Tuesday, The Three Pigs, Freefall, Sector 7, and more.  Bluebird by Bob Staake is my new favourite book. This is a story of friendship and bullying, and is a very emotional read. A little bluebird befriends a boy who is bullied and lonely, and ultimately changes his life. Adding students' own voices to this story could be a very thought-provoking project.
The last book I'd like to talk about today is Zoom by Istvan Banyai. In this book, the reader "zooms" between a farm, a desert island, a ship and more. And then your eye zooms out as you realize you were not where you thought you were! Wonderful writing prompts in this book as well, and I'd love to see what students could create with Explain Everything. |
Lori EmilsonTravelling Curriculum Support Teacher Archives
April 2017
Categories
All
|
 RSS Feed
