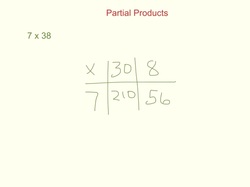
 Partial Products is a nice little method for multiplying large numbers. I recommend showing students how to do this method of multiplying before introducing them to the traditional algorithm - the way I learned to do it in school, which was the only method we were ever taught. To multiply 2-digit numbers, have kids begin by splitting up the numbers into expanded notation - hundreds, tens and ones. For example, to do 38 x 7, think of 38 as 30 and 8. Now multiply those numbers by 7. So, 30 x 7 = 210 and 8 x 7 = 56. 210 + 56 = 266, therefore 38 x 7 = 266. The picture above shows this thinking symbolically. 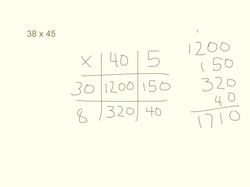 Use this method for larger numbers as well. 38 x 45 is 30 x 40, 30 x 5, 40 x 8 and 5 x 8. The picture at the left explains this thinking a bit more clearly. Once you have all the multiplication finished, just add the products together to get the final product of 38 x 45. To those of us who are used to multiplying with regrouping (carrying the tens, hundreds, etc) this sounds complicated, but kids will get the partial products method way faster than the traditional method. Once they understand how to multiply larger numbers, then definitely introduce the shortcut, which is the traditional algorithm, but don't introduce it too soon! If kids learn to do the steps of the traditional method before they understand why those steps work, we are setting them up for a lifetime of math phobia. Check out my YouTube video below for a full explanation of this method, as well as the Partial Quotients method of dividing large numbers, which I explain below. 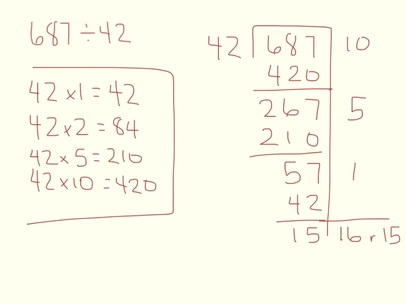 OK, now let's use this method of partial "answers" and apply it to division as an alternative to long division, which is a much hated concept across middle years students (at least, I hated it!).
To begin the Partial Quotients method of division, I like to start with a quick list of multiplication facts, which will lessen the mental load I'm carrying while I do the division. So if I'm dividing by 3, I make a list of the 3x facts that can help me - specifically, 3x1, 3x2, 3x5 and 3x10. The example in the picture above shows the facts of 42 that I can draw on to solve 687÷42. Next I think about how many groups of 42 I can take from 687. I use the facts I recorded to check. I see that I can take 10 groups away, so I record that, and take the 10 groups away. Now I still have 267, so I can take 5 groups of 42 away from that, which is 210. I still have 57, so I take one more group of 42 away and I have 15 left over. That means I have taken away 16 groups of 42 and there is a remainder of 15. Therefor, 687÷42=16 r15. Easy peasy. As I mentioned with the multiplication strategy above, introduce this method before you show students the traditional method of "long division." If you introduce the standard algorithm too early, there is the danger of kids learning the "dance steps" without understanding the concept. This is setting them up for failure down the road. I encourage you to watch the video, as the method is easier to understand when you see it in action. Good luck!
0 Comments
 I have a new respect for an app that I've had for a long time. Book Creator looked to me like a nice little app where kids could write their own stories and illustrate them. And that is true, but it is so much more than that! Students can not only add their own illustrations, but upload images saved to their device, and even record their own voice. Here's how to use it: 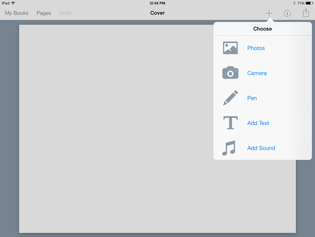
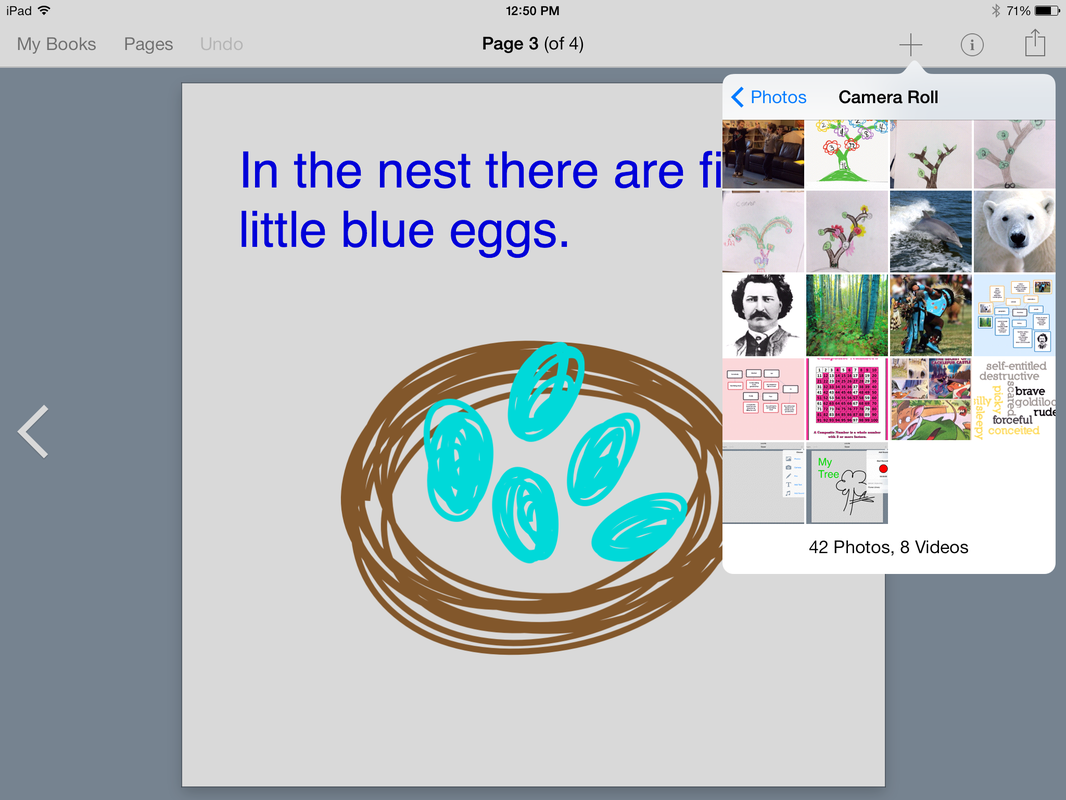
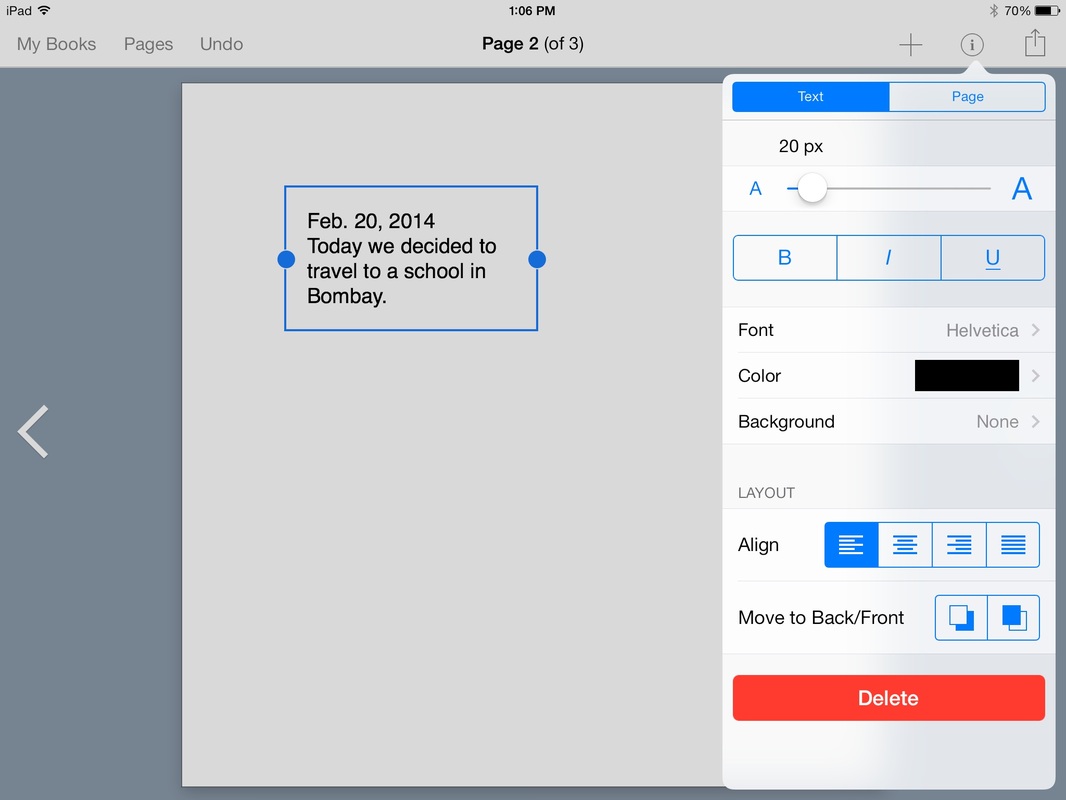
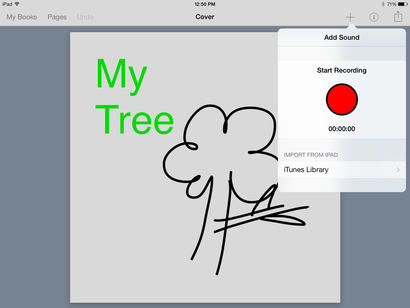 3. Once you have your cover the way you want it, you may decide to record your voice. Choose "Add Sound" from the menu. Press the red button (be sure to allow the app access to your device's microphone) and then talk away! 4. When you are finished speaking, press the red button again, and choose "yes" or "no" to indicate if you wish to include the recording in your project. If you decide to keep the recording, a small circle icon with a speaker symbol is placed on your page. You can resize and move this icon anywhere on the page. 5. The picture top left shows how to add images saved in your camera roll. 6. Once you have text (or a drawing, or an image, for that matter) press the "i" icon to edit. This give you options such as resizing text, changing text box shape, font, font colour and more (see top right). 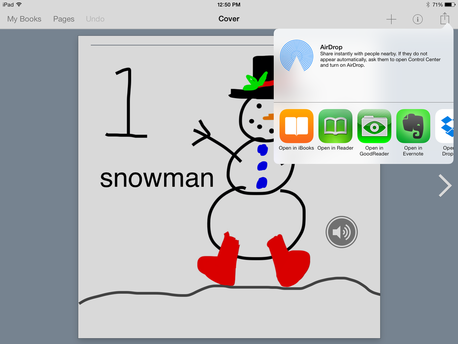 7. When you are satisfied with your book, or even if you just want to see what it's like so far, I like to open it in iBooks to view as if it is now a published book. In iBooks, you turn the pages by swiping, and click to hear the recordings you've included, just like a real talking book that you buy! 8. You'll see in the photo at left how you can share books between iPads. Just click the AirDrop icon to load all of your students' books onto one iPad to make it easier for sharing or assessing. 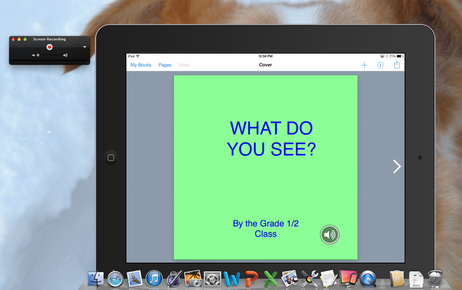 9. And finally, here's what I learned to do today! I installed the Reflector app onto my Mac computer. Now I can see my whole iPad on my large Mac monitor. I can also use QuickTime to do a screencast of the book I've made, which turns the book I've made into a movie. My colleague Mandy (@Mandy_S_24) wrote about how to do this on her blog (click here.) Now I can share this with parents who don't have an Apple device.
I have used this app now with a class of Kindergarteners who made a counting book about winter. They each made their own page and then we combined them into one class book. Their voices are so cute!!! "Three snowmobiles - vroom vroom vroom!" I used this with a Grade 1 class, who used Book Creator to retell the story of Jan Brett's The Mitten. In that book, a little boy loses a mitten in the forest, and one by one, more and more animals squeeze into the mitten as it stretches and stretches. The Grade 1s not only illustrated their retelling, but counted the animals by 2s, making it an excellent Math/ELA integration project. I also used this app with a Grade 3/4 class who used it as a travel journal. Their class was studying India, and every day their teacher had virtual excursions planned for them. After their day trips, they wrote about their experiences in their journal as if they were really in India. I have to say, these journals turned out wonderfully! After their yoga class, for example (they followed along with a yoga instructor), many of the students took photos of themselves in various yoga positions to add to their journals. Voice recordings were included for each day. Awesome! It is the sharing of these journals that really adds to the significance of using this app. Book Creator can be exported as a PDF or as an ePub via email, print, iTunes or opened in other apps such as GoodReader, Evernote, DropBox, Google Drive and more! With every update Book Creator is easier to use and includes more options. Can't wait to see what they have in store for us next! If you have some ideas for using Book Creator in your classroom, please share them in the comments below! 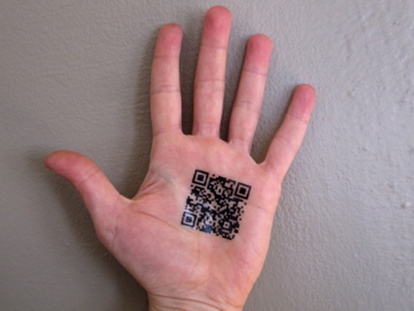 QR (quick response) Codes are popping up all over the place (even tattoos!). Originally used in advertising only, they are really gaining in popularity in education. That's because QR Codes can give almost any type of information. I thought today I'd write a tutorial on how to make them. You'll be totally impressed with how easy it is. Photo credit: www.flickr.com 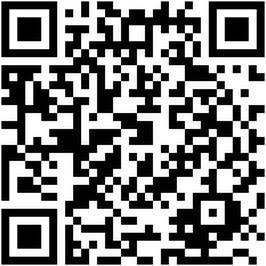 I wrote about using QR Codes in education a while ago (scan code at left to access or click here). Let's make a link to a website that you want your students to use. In another tab, open the website and then highlight the address. Right click "copy" to save the address. Then go to my favorite QR Code creating website, which is goQR.me. It's easy, fast and free - what more could you ask? Click the box in the first position, which will enable you to make a QR Code that takes you to a website. In the box labelled #2, right click and paste the address of the website you want the code to take you. Then press enter. The QR Code is now displayed for you at the right. You can click "Download" to save it to your computer, but I usually just right click on it and select copy. Then I open a document (say, Word or Publisher) and right click paste, and there's the QR Code. Ready to be printed out on a worksheet! That's how easy it is! Another option, depending on how you're using the QR Code, is to right click the code and select "save as." Then you can project your QR Code at a later date using your LCD projector. Using their iPads or other devices, your students can all scan the code at the same time and there they go - to the website of your choice! 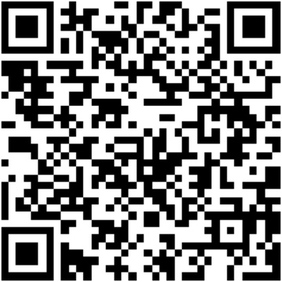 Let's say you don't want the QR Code to take you to a website. You want to use it to give a text message. I like putting QR Codes on worksheets so that students can self-correct. Click here for an example. Here's how to do that. Go back to goQR.me. This time select the second box, which is labelled "Type." Type your message into the box beside it and press enter. That's it! Easy peasy. Note that the more text you have in a QR Code, the more dense the code will be. Some scanners and/or devices (especially older ones) have trouble reading dense codes, so if you have lots of text you want your students to read, use several QR Codes. You'll notice that there are other options for types of QR Codes at this site, including making a phone call, sending email, adding an event to a calendar, etc, but I tend to use just websites and text so far. 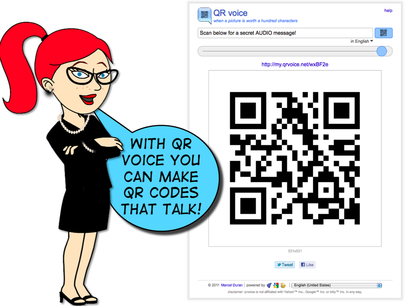 Photo credit: www.flcikr.com Another site I've used is qrvoice.net. With this site, you can have your QR Code talk to you! Here's how to do it. Go to qrvoice and type your message in the box at the top of the page. Press enter on your keyboard. Copy and paste. That's it. So simple. This would be great for giving reminders about instructions, or clues for a scavenger hunt. It's especially useful for students who have trouble reading. There are many, many QR Code creating websites out there. Another good one that I have used is Kaywa. You do need to create an account in order to use this site, but it's free. You can also choose between static and dynamic codes. Static codes give the information the same way each time it is scanned. If you choose dynamic however (you get 5 free with an account, after that you have to pay), the QR Code can be changed on the website so that the next time the QR Code is scanned, it gives different information. Kinda cool, but I have never used a dynamic code.  Photo credit: www.flickr.com Another good site is qrstuff. This site also requires an account, but it's free too. This is the site you would want to use when you want to be technofancy (is that a word?). It has no fewer than 21 different options (it can even make a Skype call for you!), and you can add color and logos to your QR Code. I can see why advertising firms would use this site, but it's a bit too fancy for me. The last site I would like to mention is Bingo Baker. With this site you can create your own Bingo games with QR Codes that would be so much fun to play with your students. It's very easy to use - just follow the instructions on the site. I would use it to practice math facts, vocabulary terms and/or sight words. Lots of fun! Another option teachers might like to use is to have the QR Code display a picture of something. To do that, you must have the picture saved online somewhere, since QR Codes are all about the internet. I save my photos to DropBox or Google Drive. In Google Drive, click on the picture you want to use in the QR Code. Then click the "Share" button. A link is displayed for you. Simply right click to copy the link, and then paste the link into a URL code creator, as mentioned in the first example. Again, very easy. DropBox works much the same. I forgot to mention the scanner app I use. i-nigma is the app I prefer. It's easy and fast, and free! These are a few of my favourite things! Problems with QR Codes
I would be remiss if I didn't mention some problems with QR Codes.
Have fun with your QR Codes! If you have a site that you like, PLEASE mention it in the comments below! Thanks! 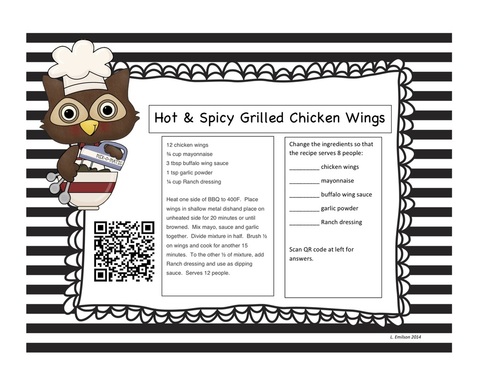 I'm working in a Grade 7/8 classroom this week, demonstrating Guided Math. The teacher wanted me to focus on operating with fractions (adding, subtracting, multiplying and dividing). For Guided Math, I want to have several stations that the students can choose, and I'm always on the lookout for real world application of the skills they are learning. Any chance to integrate technology is always welcome too, of course. :) I couldn't find any resources that I was happy with for this grade level, so I decided to make my own. I actually put a lot of effort into these worksheets, so I thought I'd share them on here. I even purchased clip art from the Scrappin' Doodles website, which was actually very easy to do, and reasonably priced. Click here to access my Google Drive folder of QR Projects.
When do we operate with fractions? I can think of several scenarios, but the one that I use quite often would be converting recipes to suit the amount of people I want to serve. I used the Kraft Canada website to find some recipes I knew would be great. I needed simple recipes that would appeal to this age group, and also ones that had not too many ingredients, as I wanted to make a QR Code so they could check their answers. (I wrote about how to create QR Codes here.) This site was great for that, and I highly recommend checking it out! (I also used the Hunter Angler Gardener Cook website for a goose jerky recipe, as I thought that may appeal to some students who weren't completely sold on baking.) So, when the students go to this station, they take a worksheet and convert the ingredients from serving 12 people to serving 8 (for example). Once they have their answers on the worksheet, they use the i-nigma app (it's free!) on the iPad to scan the QR code at the left so they can self-correct. That's it. Independent practice time using a skill they are currently working on, and no extra marking for the teacher. That's what Guided Math is all about - freeing up some teacher time so s/he can work with small groups and differentiate a little more easily. I wrote about Guided Math here if you are interested in reading more about this management option for your Numeracy classroom. I do plan to continue to add more worksheets to this unit, so if you like them, check back again later to grab some more freebies. 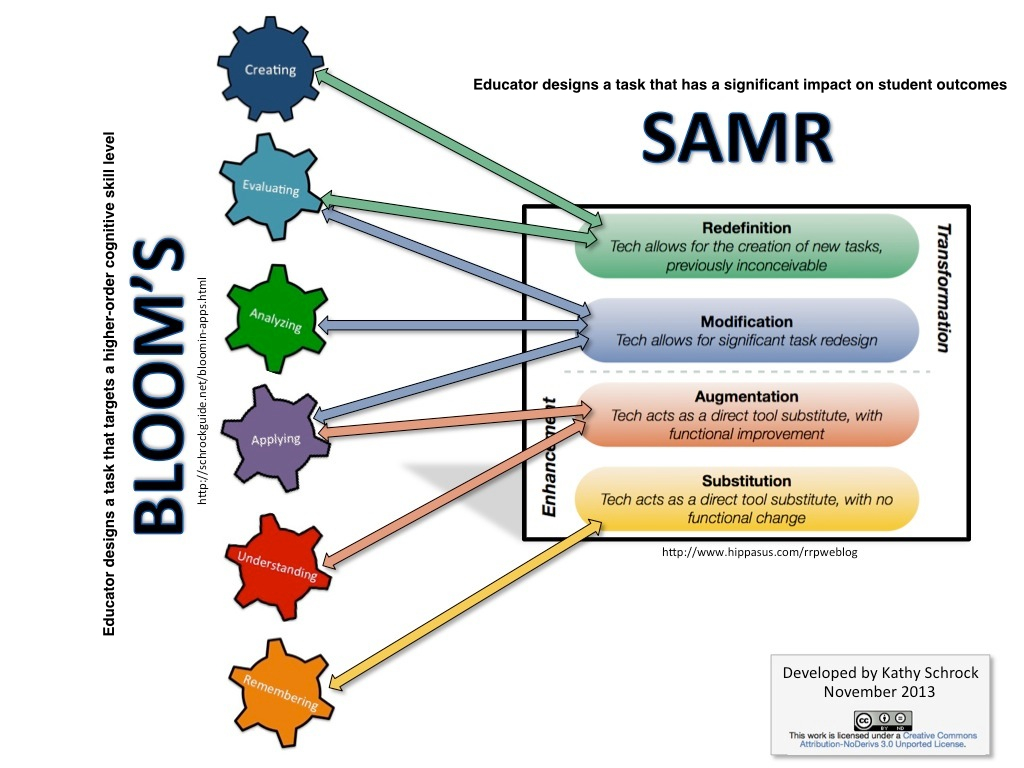 Have you heard of Dr. Ruben Puentedura? I had, in connection to some model of technology called SAMR (which stands for Substitution, Augmentation, Modification and Redefinition), but to tell you the truth, I didn't really get it. Today I had the opportunity to hear Dr. Puentedura speak at the MAETL (Manitoba Association of Educational Technology Leaders) meeting, and it was a light bulb moment! Now I get it! Basically, SAMR (created by Dr. Puentedura) is like Bloom's Taxonomy, but specifically applied to educational technology. Here's how it works:
Whenever a teacher uses technology to enhance a student's learning, the activity falls somewhere on the SAMR model. A low level activity would be considered Substitution. For example, let's say you get kids to read a story on the iPad instead of the regular paper copy. That's it - nothing else. You have substituted a paper copy for technology, and maybe the student is a bit more engaged because it's the iPad, but there's no other benefit to using the iPad. This is considered a "direct tool substitute." Augmentation is the next level of integration. So let's say, while reading the story on the iPad, the child can touch some of the words and have them read aloud. That's cool, but the student could also have someone sit beside him with the paper copy and have words read aloud too. But this is a definite "functional improvement," as seen in the model above. Both Substitution and Augmentation are considered Enhancements to tasks. There is a significant jump to the next level of SAMR: Modification. This level includes redesign of the task. Using our same reading example, now the student could be asked to read the text aloud and use an app to record himself reading. Then the audio recording could be posted to a class blog. Whoa! Authentic audience! World wide audience! Feedback! Not just feedback from the teacher, but feedback from anyone else who reads the blog and comments. As the student reads the comments on his recording, he has the opportunity to rerecord and replace the original upload. The final level of the model is Redefinition. Now we're talking about creating new tasks, "previously inconceivable" ones at that. The audio recording in the example above could be added to Explain Everything (I wrote about it here), and annotations of the reading strategies employed by the student added to the slides, and/or images, and/or video. The ultimate in creation. Previously inconceivable. The model above (created by Kathy Schrock) shows how SAMR connects to Bloom's Taxonomy. There are four levels of integration, and just because a task falls in the lowest level doesn't mean we shouldn't employ it. However, as educators, we need to be aware of SAMR, and strive to reach for those upper levels too! |
Lori EmilsonTravelling Curriculum Support Teacher Archives
April 2017
Categories
All
|
 RSS Feed
